
A blog is a great way to express your insights and knowledge about something to the world. However, starting a WordPress blog for beginners can be challenging as you need to set up a website first. And if you’re that beginner who doesn’t know what is WordPress at all, then this article is definitely for you.
Don’t worry, WordPress is not big of a fuss. It’s just a Content Management system, in other words, a website builder and customizer where you can make and run your website!
It’s not hard to make a blog site using WordPress. Nevertheless, to make your life a lot easier, I’m gonna give you a step-by-step guide on how to start a WordPress blog today!
By the time you reach the end of this article, you will have published your first blog post on the internet. And the best part about this is you can do this completely for free! Stick to the end to know all the facts and figures.
Let’s get straight into building your WordPress blog!
Things You Need for a WordPress Blog
To start a WordPress Blog, you need two things specifically:
- A Domain Name: This is your website URL, which, in most cases, is your blog’s name (e.g., newwebber.com). It’s what people will use to find your Blog from countless others in a search engine like Google.
- Hosting space: A space on a web server that stores your blog’s data files. The server runs 24/7 so that your blog stays live all the time.
Read this guide on how to find the best hosting for WordPress to ensure a perfect hosting choice.
However, to build a website via WP site builder, you need to install the WordPress app into your system. And when it comes to installation, you should know about the two types of WordPress installation. These are:
- Self-hosted
- Hosted by WordPress.com
The first type is self-hosted WordPress which we know from wordpress.org. This is a website building and managing software where you have full control over everything – the hosting space, the domain name, and everything that goes on the website. However, you have to carry the burden of cost to buy a domain and rent hosting space.
I know, that for some dreamers, spending money upfront on a project is not easy. Maybe you’re trying it out to see how it goes, or just don’t have to luxury to buy a domain and hosting at this moment.
Here comes the second option – hosting by WordPress.com!
In this, WordPress hosts the website for you and it’s absolutely free.
But again, remember, it’s not that software WordPress which is the website CMS, it’s the service providing WordPress. There are some major differences between WordPress.com and WordPress.org. You better keep up your knowledge regarding these two to know what’s best for you.
WordPress.com is free and convenient for those who don’t want to spend a penny!
Even though WordPress.com is free and easy to use, it has some drawbacks. There is a restriction on using the custom domain name. They will put their domain on top of your domain just like those copyright images putting their logo on the items.
For example, if you choose your domain name to be “pizzapro” then you’ll get, “pizzapro.wordpress.com” not “pizzapro.com”. See my point now?
Also, you cannot integrate Google Adsense or any kind of monetization on the free WordPress plan. Overall, the customizability is limited.
For a basic blog, WordPress.com is fine.
But to sustain the blog and make money out of it, you need your own domain and broader hosting package. So, that’s what we’re gonna learn today.
Let’s dive deeper!
How to Start a WordPress Blog – 9 Easy Ways
Starting a blog is not that hard, especially when you’re using WordPress CMS. Form an idea, get the name, rent the space, set up the website builder, and start creating your first blog!
Sounds super easy, right?
It’ll get a lot easier and fun when you start the real work. So, without any further ado, let’s start from the beginning:
Here, I will show you how to set up a WordPress blog on a self-hosted server. This means you are responsible for getting the domain and hosting services.
For those looking for the free WordPress.com, I have created a separate section, which you’ll find as you read ahead.
Step 1. Choose your Niche
At the very beginning, you need to pick up a niche to start your blog. Don’t know what’s a niche? Let me tell you about that.
Every blog talks about something. That’s their niche or subject. It’s the very first intention of starting a blog. You want to talk to a wider audience and express your views about a topic, and that could be anything.
Maybe you like cooking and want to share the intricacies of recipes with everyone. That can be an excellent subject for a blog. It’s just not about recipes; you could talk about how a particular spice separates a dish from the rest.
Apart from food & cooking, other topics make a good niche for blogging. Some of those are:
- Personal Finance and Investing
- Health and Fitness
- Digital Marketing & Making Money Online
- Lifestyle Guide and Personal Care
- Fashion
- Technology
- Traveling
Anyway, targeting a key audience is the key here. You have to do keyword research and find what people are searching for. Based on that, you have to write and make sure you are providing what the audience looks for.
Step 2. Choose your Blog’s Name and Hosting Service
Right after choosing a blog niche, you need two more things to start your voyage– a hosting space where your site will live and a domain name that will be the identity of your brand.
Then WordPress comes in as a content management system that will bring life to your blog idea via a WP website!
Buy Website Domain
After finalizing the niche, pick a domain name and buy it from a reputed source. It is your blog’s address. People will type that in a web browser to visit your blog.
For a domain name, choose something that identifies with the blog. So that anyone looking at the address can tell instantly what the website is about. Take TechCrunch, for example. You can know by the name alone that the site caters to the latest things happening in the world of tech.
As for us, newwebber.com is where new webbers like yourself who are new to the world of web development can find their desired solution regarding websites and things. It’s pretty simple!
So, get a unique domain name, that reflects your blog’s purpose and is easy to type.
Once you settle for a name, use a free tool such as Domain Name Analyzer to check whether the domain is available for purchase. Once you get the green flag, you can go buy that domain name for yourself.
Anyway, let’s know about domain pricing…
Domain names start from $10 per year and can go way up to millions! Trust me, there are those names people are gonna pay way above their pocket for!
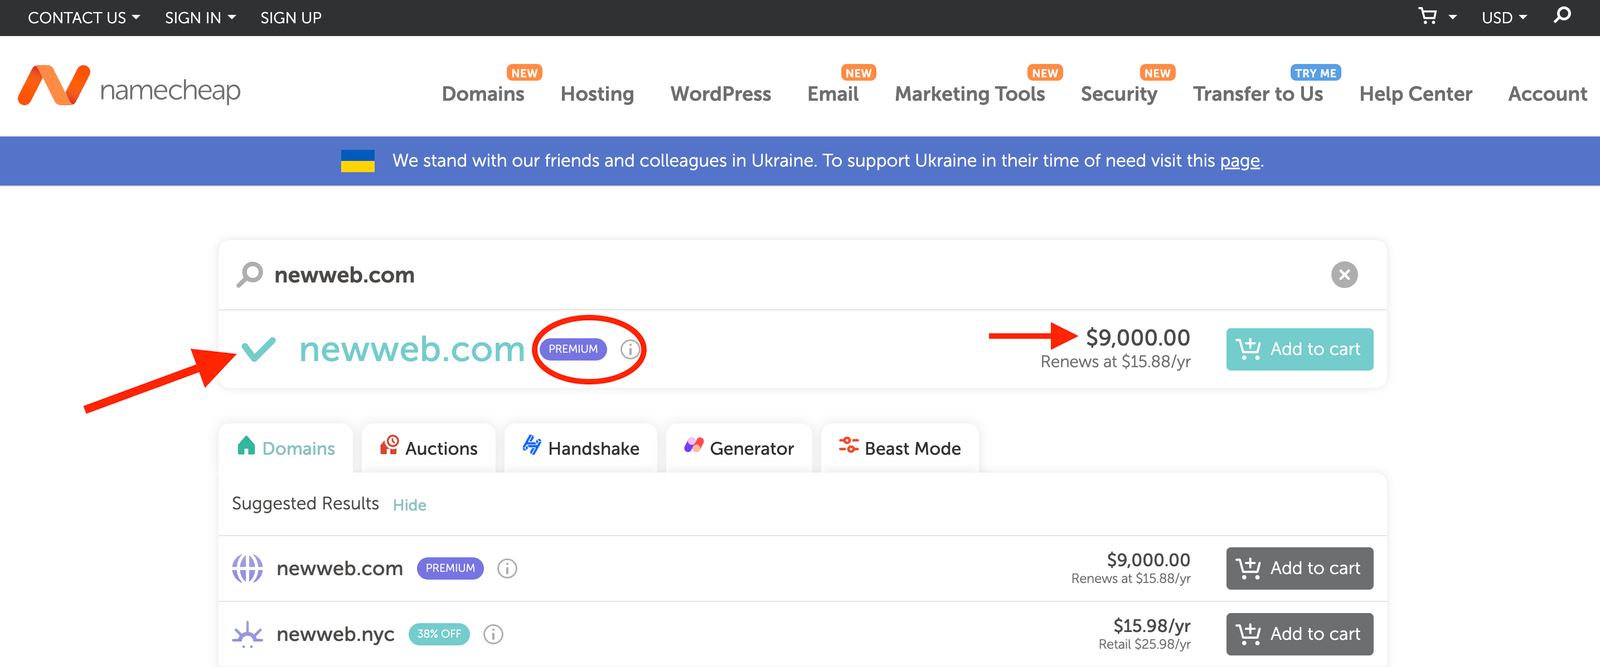
However, if you’re just starting out, you should pick up a domain name that does not seem popular and similar to trendy names. Domain registration companies tag those domains as Premium. That’s because those names contain brandable keywords, short in length, and dictionary words. For example, if you search for newweb.com on Namecheap you’ll see a $9000 price tag on it!
Buy a Web Hosting
Once you’re done registering a domain, next comes your hosting provider who will host your website on their server.
Servers are basically computers storing and running your blog’s data. It seamlessly runs 24/7 around the world so that anyone can access your site no matter what time zone they are in.
However, there are tons of companies out there renting server space. Cloudways and WPengine are two of them. Both are good and offer great deals to their customers. But you should only choose the best hosting for WordPress which provides strong server security, higher uptime, easy upgrade options, data backups, and scalability. Additionally, you should determine the size of a web server for your website based on your expected traffic volume.
Whatever size you pick, just remember, that as the storage space increases, so does the monthly fee.
Usually, hosting with the most basic plans starts at $7 a month. But standard plans with more storage spaces and SSL built-in costs around $12 per month. Many retailers give you a discount for the first year if you choose to buy a yearly subscription plan.
Some providers even bundle domain and hosting together at a fairly discounted price. Get the deal best for you and save some additional cash.
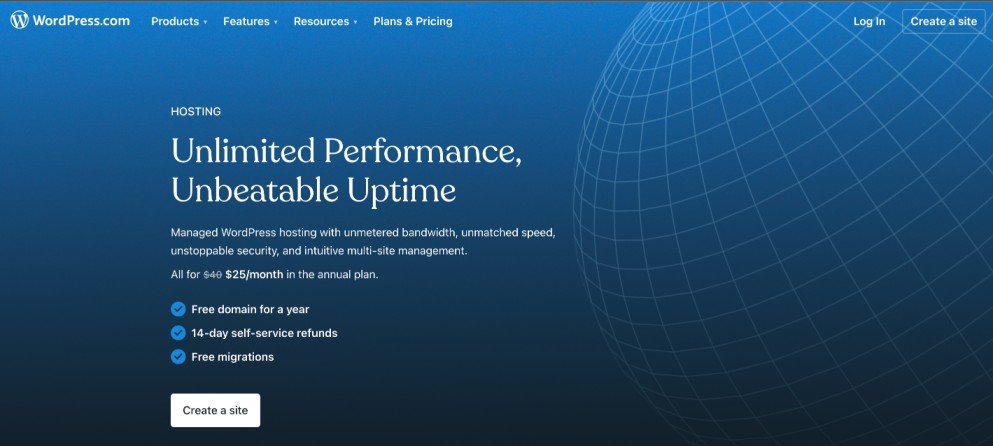
Another option is to choose WordPress.com as your hosting provider. The company itself hosts the servers and provides attractive plans based on different needs.
Some other features you get include:
- Premium Themes
- Fast DNS server
- 99% uptime servers
- SEO Tools
- Malware and DDOS Protection
- WOO Commerce Platform tools and services
[wptb id=124]
Once you choose the hosting and finalize a domain name, you will land in your web host control panel. From here on, you can install WordPress.
Step 3. Set up WordPress
Now, it’s time for some real techy tasks – installing and starting to customize WordPress!
There are two ways of installing WordPress. Automatic and Manual.
The first method is better for first-time users configuring WordPress. The hosting company Bluehost is a great example of this. The interface for its admin panel is very intuitive and easy to understand. So, if you buy your domain and hosting from the Bluehost company, then follow the method below.
Note: If you buy from another hosting provider other than Bluehost, don’t worry. The installation methods are pretty similar for every site. Just learn this now, and you’ll catch up on others.
Let’s see how to install WordPress on Bluehost:
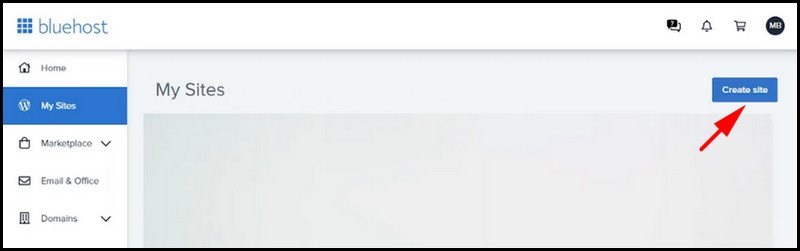
To install WordPress on Bluehost, log in to your Bluehost Admin Panel using your email and password. Then click on My Sites and press on Create Site.
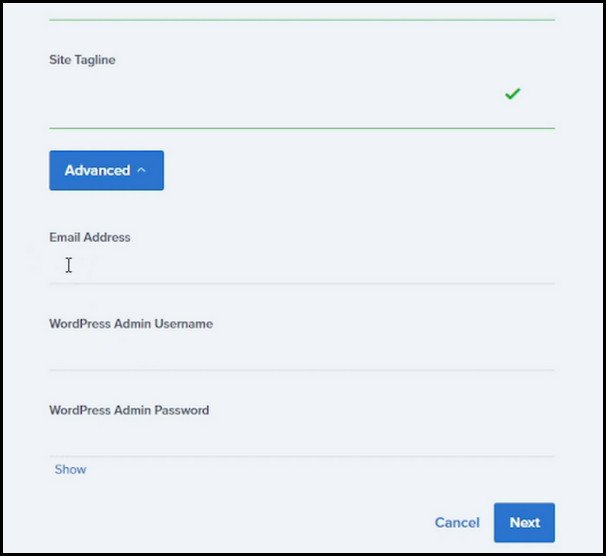
Here, you need to enter your blog’s name and a short description of it. Once you do that, click on Advanced. Then, enter your WordPress admin username and password. Choose something difficult to guess. It will make your blog more secure.
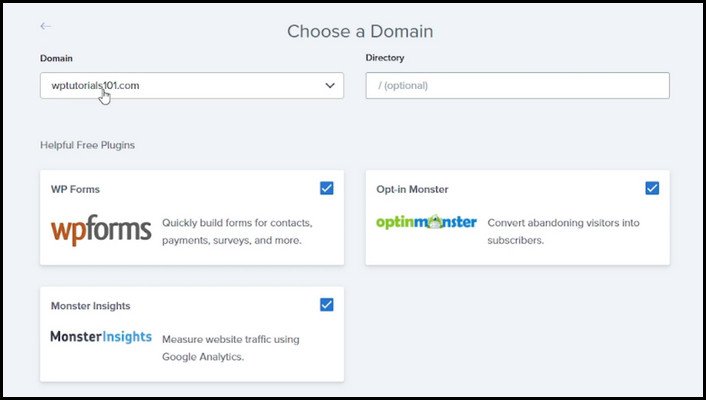
Next, choose the domain name for your site. Keep the sub-directory field empty. Unselect the plugins that Bluehost recommends to you. We will install these later on. Now, click on Next to complete the WordPress installation.
That’s it, you’ve just installed your website builder – WordPress. Now you can start customizing your website from the WP dashboard.
Logging to your WordPress Dashboard is the first step towards your WordPress blogging journey. Your dashboard is located at sitename.com/wp-admin. Though you can use your custom url to log into WordPress dashboard, the default url remains wp-admin.
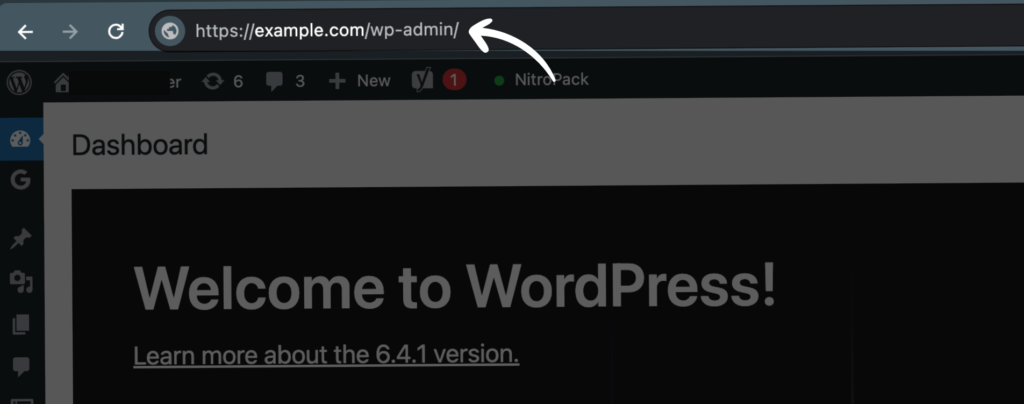
Use the username and password that you set earlier on to log in. Then you can make all sorts of customizations to your blog.
However, if you want to install WordPress manually, the admin panel provides an option for that, too.
Normally, when you log in to your host provider using the username and password, you land in the admin panel software. Depending on the hosting provider, they can use cPanel or H Panel. From here, you can install WordPress.
Here’s how to install WordPress manually cPanel:
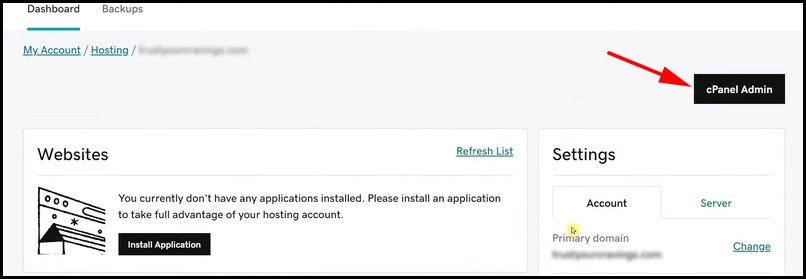
Log in to your hosting Admin Panel. Then find option cPanel Admin from the dashboard and click on it.
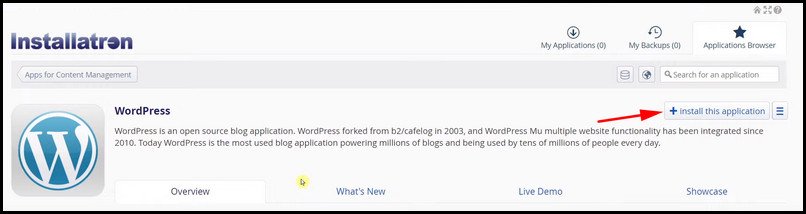
Scroll down and click on WordPress under Applications/Software. The WordPress app page will open up.

Click on Install this application.
Now, select your domain name from the drop-down menu and check the Automatic Backup and Update option for WordPress and its plugins. This will automatically install recommended plugins while installing the site builder application.
Provide the username and password for your WordPress admin page.
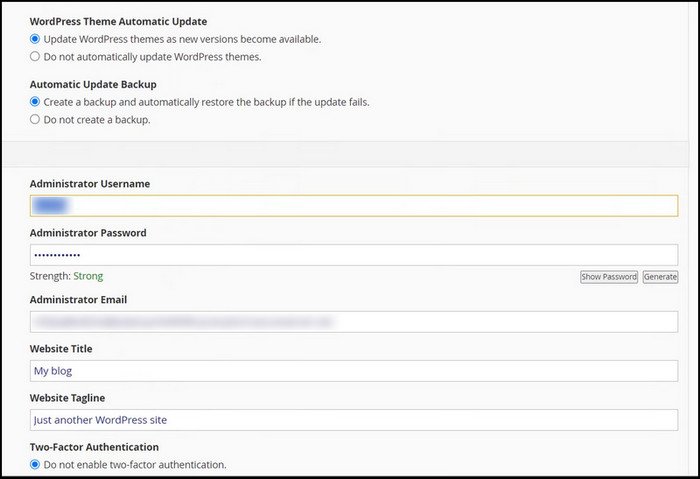
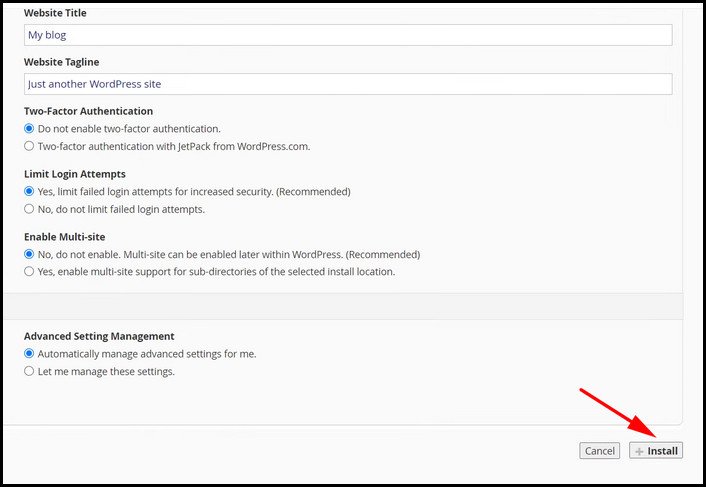
Choose Two-Factor Authentication and Limit Login Attempts to enhance the site security.
Give your blog a title and a tagline to explain your niche well. Lastly, click the Install button at the bottom to start the installation process.
Now, wait for the installation to complete. After it finishes, your website is published on the Internet. You can type in your domain name in the browser, and it will take you to your blog.
Anyway, for now, you’ll see nothing except for some placeholder posts on your site. That’s because we didn’t put anything yet. Once we customize the site using themes and add content, it will start to look like the blog that you want.
Step 4. Choose a WordPress Theme
Themes decide how your blog looks. There are free as well as paid options available. For starters, there are plenty of good free themes you can use. You don’t need to buy a premium theme when you are just starting up your blog.
By default, WordPress comes with a Twenty-twenty-four theme. But you can change this to something else very easily.
To change the default theme, you have to log in to the WordPress admin panel. The address for that is similar to this: yoursitename.com/wp-admin. Just replace yoursitename with your blog’s domain name and go from your web browser.
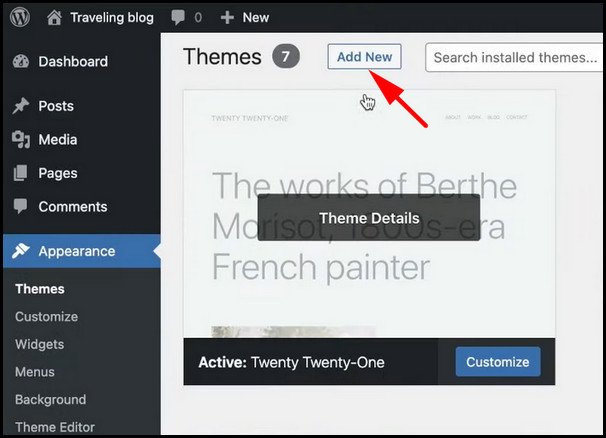
Once you log in, click on Themes under Appearance. Press the Add New button here. You can see a huge collection of designs. Choose the ones you like from here.
It is a good idea to Preview a theme before installing it. Then, you know how it will show up on your blog.
For blogs, I’d recommend going with a simplistic design. Make sure the fonts complement the overall design well. The idea is to make sure the content pops out, which is the heart and soul of your blog.
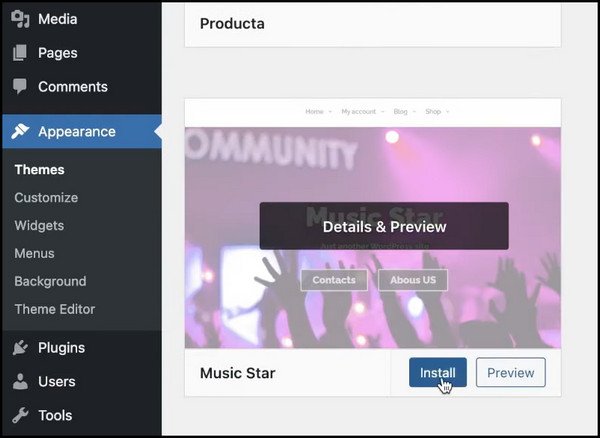
After you have decided which design to go for, click the Install button. The theme will download and get installed.
To check how your blog looks now, go visit from the browser. Clicking on a sample post should reveal the post view for your blog. Here, you can notice all the things you would like to customize on your blog. Note everything and keep it in a safe place.
Step 5. Install WordPress Plugins
Plugins enhance the functionality of a WordPress website. A very simple example of a plugin would be a contact form. Let’s say you want the visitors to leave you messages about what they think of the blog.
Normally, you would need to code this feature yourself on a traditional website. Either you could do it or hire an expert to do that. But on WordPress, things become a lot easier. You can search for a plugin, such as the popular WPForms, and install it.
After this, you can bring a contact form to your blog by simply doing a drag-and-drop from the plugin options menu in the WordPress Dashboard. No coding is required on your end.
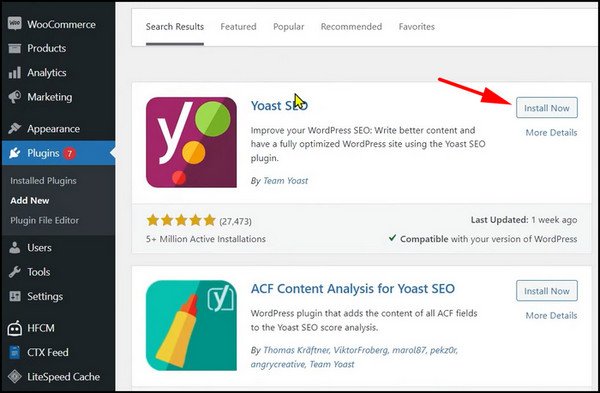
There are more than 60,000 WordPress plugins that you can choose from. Installing a plugin is very similar to Themes. Just click on Plugins > Add New from the WordPress Dashboard and search the plugin you require. Once you find it, clicking the Install button will download it on your WordPress site.
For new blogs, you would only want to install as few plugins as possible. This is because plugins can make the site heavy. This often makes the site take longer to load.
You’re gonna need to install some essential plugins while starting a new website. For example: WPForms, Yoast SEO, Wordfence Security, etc.
If you know more about installing WordPress plugins, then read our full guide on How to Install a WordPress Plugin.
Step 6. Customize your WordPress Blog
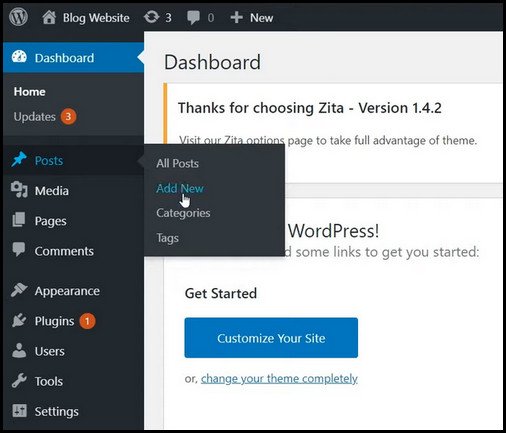
Your blog may be live and contain a few posts, but it still looks like a work in progress. There are some placeholder posts that you need to remove from your website first. Going to Posts > All Posts will reveal this. From here, choose the ones you do not need and delete them.
Next, you will add some pages. A typical website contains About Us and Contact pages. These convey the information about the blogs. You could write something about yourself for the visitors to know more about you. The contact page will have a form that you can create using a plugin.
Then, you would likely add the headers and footers to your blog. By default, they contain placeholder text, so replace those with your own. After that, add a navigation bar AKA the menu bar that contains different pages for customized content.
If you want to make extensive changes to the theme that you chose, use a page builder like Elementor to create custom page layouts by drag and drop elements without using any coding. From changing fonts and text colors to adding new sections to a page, you can do almost everything.
Step 7. Publish your First Blog Post
At this point, your site is visually ready, but there are no posts. Blogs contain the articles that the viewers will digest, so it’s time you start writing one.
Before publishing the post, you would create a draft on a separate Word Processor such as MS Word or Google Docs. It is more convenient and easy to edit a text file there rather than on WordPress. Make sure you have a final draft ready that you can bring on WordPress ready for publishing.
Your posts will typically contain text and images. Keep relevant images that enhance your post. They will make the post more appealing to the readers.
Once you have everything ready, it is time to publish the post. To do this, go to the WordPress Dashboard and click on Posts > Add New. This will open the WordPress text editor.
Here, you can add texts, images, videos, and links to your post. First, you need to bring the text for the post from Google Docs and paste it into the editor. If you click the Preview button now, you will see all the text appears in the same font because we have not applied any formatting to it.
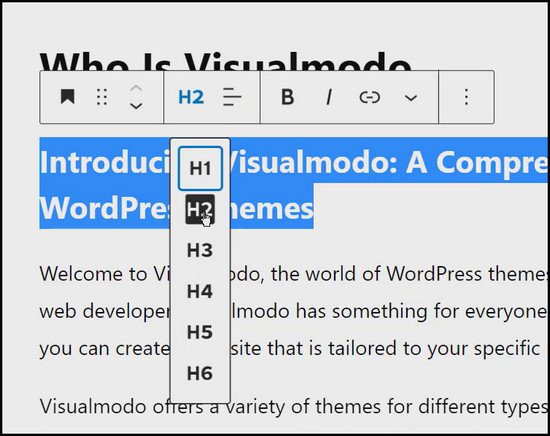
So, select Headings and Paragraphs from the text formatting menu at the top. Change the font size if needed. Make the customizations until you feel the text looks readable for the users.
You can either use the classic text editor or a block editor like Gutenberg. In order to grab the most out of an editor, I use the block editor. It’s new, updated, and came with lots of customization features. Read the guide on how to use block editor to decorate your blog post to get handy on it.
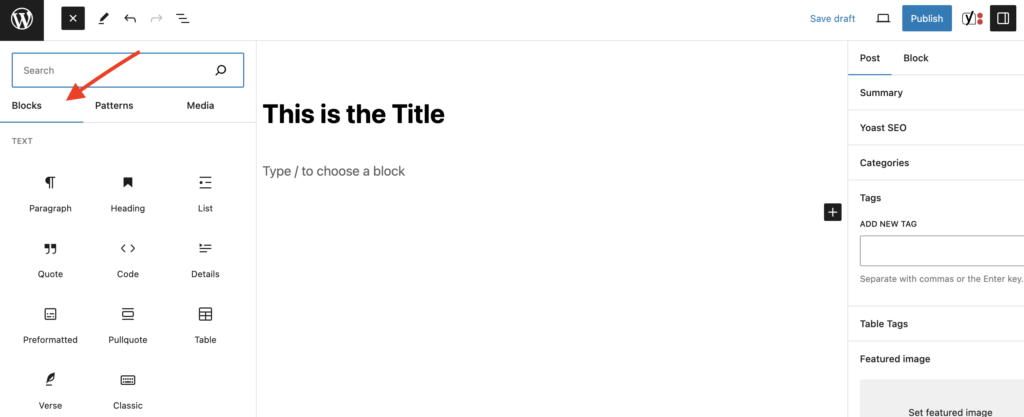
Next comes images. To insert an image, place the cursor where the image will be placed on a post. Click the Plus icon at the top and select Image Block.
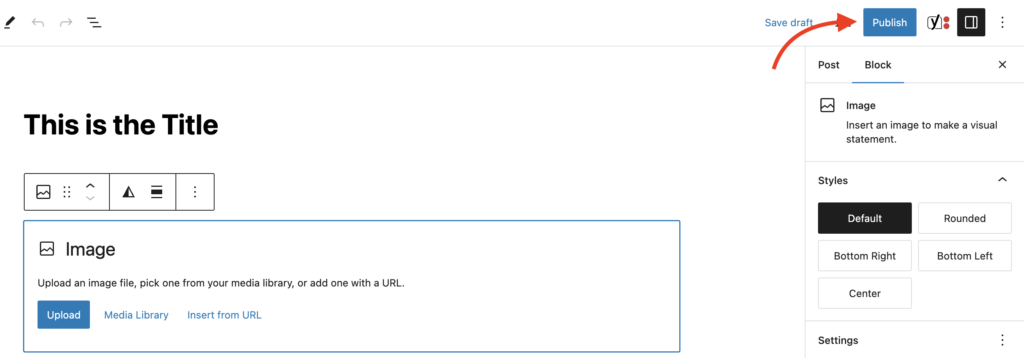
A pop-up window will appear where you can select and upload the image from your computer. Change the size of the image by clicking it. Finally, choose an alt text for the image to improve the SEO for improving the ranking.
For multiple images, repeat the same process.
With the block editor, you can insert a lot of different blocks including table, list, shortcode, gallery, audio, buttons, columns, links, and so on. Shortcodes are used in adding items and designs from plugins. Deep digger on how to use shortcode within pages and posts to learn more customization.
However, after the formatting is done, preview the post one last time to see if everything looks okay. If you’re satisfied with the content, then press the Publish button. Now, when you reload your blog in your browser, you will see it published online.
Step 8. Optimize your Content for SEO
Once you start posting from your blog, you want to make sure it reaches your audience.
Search Engine Optimization is what you need to do to make the site more visible in Google Search.
To aid you in this, install an SEO analysis plugin like Yoast SEO or All in One SEO. Then, follow the instructions and set up the blog’s site schema and markup. These make it easier for Google to find your blog.
You should also use a keyword research tool to get ideas about what people are searching for. This will help you find relevance in the topics you are writing. Plus, you already know what the audience wants and cater the content accordingly.
The blog posts should also be optimized for on-page SEO. Giving the posts a meta description and structuring a site using H1, H2, H3, and so on are considered good practices.
When you publish the posts, you will see recommendations suggested by the SEO plugin. Take note of the SEO score and try to keep it high.
Step 9. Install Google Analytics
Finally, when the blog post is ready, you should start posting regularly. But how would you know if the audience is loving your content?
Comments are a great way to gauge audience interaction, but there is nothing better than data that you can analyze.
That’s where Google Analytics comes into action. It provides all the data for your site, from traffic to interaction, post impressions, and so on. You can use these metrics to make changes to your site’s content if you notice a drop in the number of views.
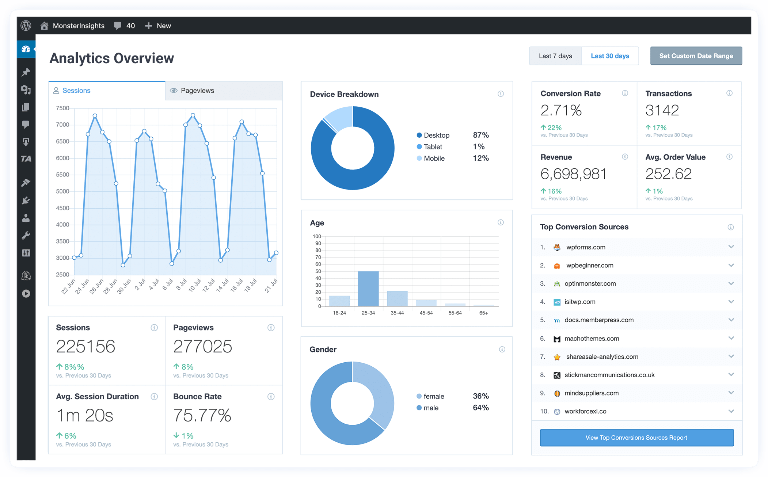
We will use a plugin called MonsterInsights to integrate Google Analytics into your WordPress blog. So, download that first from the WordPress Dashboard.
Next, you would need to sign in to the Google Analytics website with your Gmail account. Once you are there, insert your blog’s URL, and you will get a tracking code. Open the WordPress dashboard and click on Insights > Settings. Here, you will see an option to connect to Google Insights.
Press the MonsterInsights button and enter the Google Analytics tracking code. After completing some on-screen instructions, the analytics data will be visible here.
How to Create a Free Blog Using WordPress.com
Now, let’s talk about WordPress.com as I promised. You can create a free blog using WordPress.com. Then, you do not need to buy domain names and hosting plans. Everything will be managed by WordPress.
But as already discussed earlier, your blog name will end with WordPress.com and give you very limited options for customizations.
For bloggers who are starting out, it will not be a serious issue. But for the long-term growth of your brand, consider switching to a paid plan that comes with your own domain name.
With that out of the way, let’s create our free WordPress blog:
- Firstly, go to the WordPress website from your browser and Click on Get Started.
- Log in with your Google/Apple account. WordPress will ask for permissions connecting with this account, so provide these and press on Connect. Or just simply use the email address to sign up.

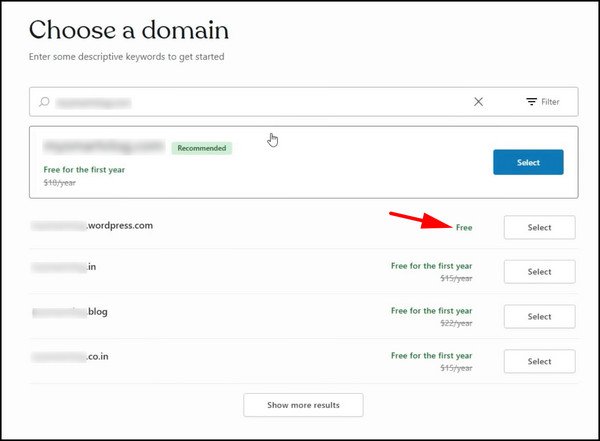
- Next, type in your blog name. You will see different plans for dedicated hosting and custom domain names. But these will cost you money. So, choose the free plan that has WordPress.com after your blog name.
- From the next screen, click on Start with a Free Site. Press on skip to the dashboard. And then, click the WP Admin Dashboard from the bottom right of the screen. Here, you can manage every blog aspect, from publishing a post to changing its appearance.
- Go to your GMail and verify the WordPress account.
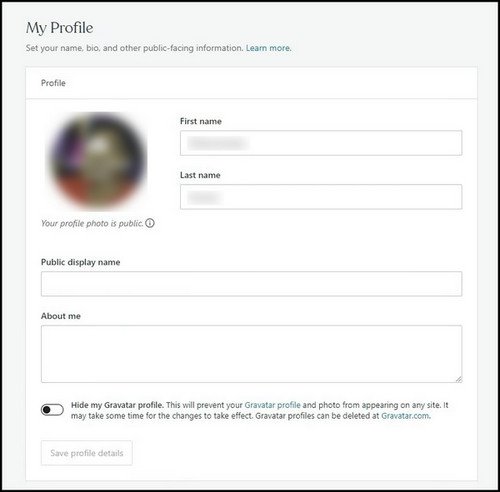
- Next, go to the WordPress Dashboard and click on your user account icon at the top right. Fill in the details of your blog, such as name, description, picture, etc.
- Now, we want to change how the blog looks and feels. Themes will change the blog visually. There are plenty of free themes on the WordPress website that you can choose from.
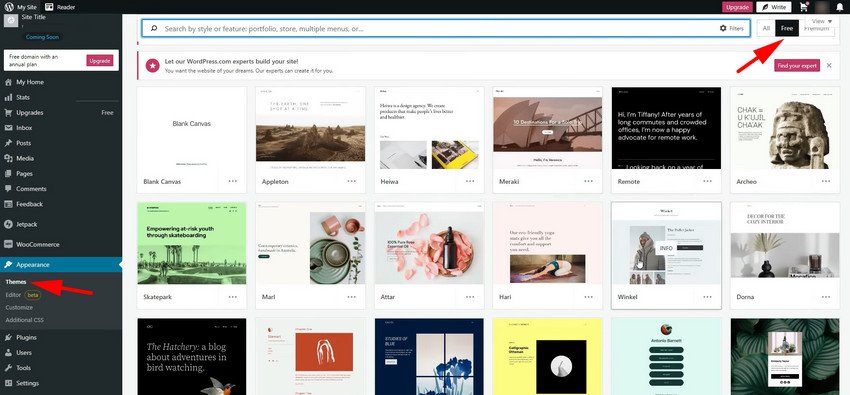
- Expand Appearance and click on Themes.
- Click on Free toggle. Choose the one that you like from the collection present here.
- Choose the theme that you like and click on it.
- Select Activate this design. To see how it looks, click on the View site button.
- Now, click on Appearance > Customize.
- Go to Site Identity. Add your blog’s name, description, and logo here and click on Save Changes.
- Under Colors and Backgrounds, you can change the site’s color schemes.
- Press on Menus. These are the pages that will appear at the top of your blog. Remove the unnecessary items and add important ones, such as a Contact and About Us page.
Our blog is almost ready now. All we need is some blog content. Adding a blog post is very similar to using a Word processor such as Google Docs. Let’s look at that now.
- Hover over Posts and click on Add New.
- Add your blog post title under Title.
- Copy the blog’s text into the editor.
- Add Headings such as H1 and H2 by selecting the text and choosing Heading.
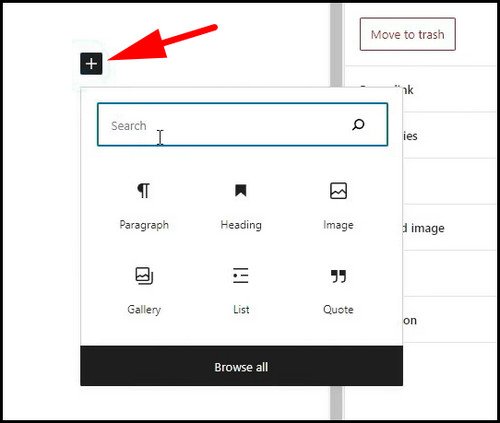
- Click on the Plus icon and select Browse All. You will find options to embed videos, add images, hyperlink texts, and many more here.
- Click on Image under Media and select the Image from your computer. You can drag the image to adjust its size.
- Click on Tags and add relevant tags.
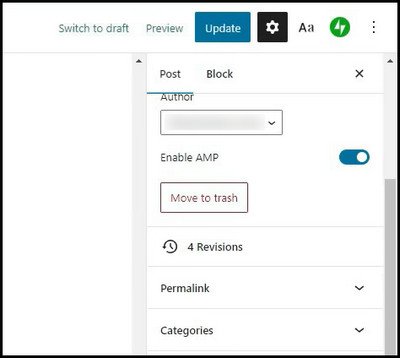
- Now, review the post to see if changes are required. Press the Preview button to see a live view of the post. Check for any typos here.
- When everything looks good, click the Update button.
That’s it! You have successfully set up your blog.
It is now live, and anyone can visit it. Put out posts regularly and keep engaging with the audience. An active blog will grow over time if your content resonates with the audience.
Frequently Asked Questions
Final Words
Now, you know how to create a WordPress blog. As you go ahead, the blog’s traffic will increase. So make sure your blog posts are relevant and you write targeting the audience.
This guide focuses on both the WordPress free and paid plans. Whichever route you choose, you will find this guide to be helpful.
So, jumpstart your blogging career and aim for stars.