
Website owners might need to migrate their websites to a new hosting platform to increase performance or improve security—and for very good reasons.
But doing so is not easy. Various risks involved in migration often discourage users from switching to a new host.
However, with the right approach and proper execution, even a beginner can transfer hosting smoothly and without much downtime or common pitfalls. Thus, to make website migration easier, I have created a comprehensive step-by-step guide on how to migrate a website to a new host safely and effectively.
Let’s jump straight into the topic.
Website Migration Checklist
Yes, switching to a newer, better, well-optimized web hosting provider can indeed improve your website’s traffic flow. It also improves the reliability and rankings in Google’s SERPs.
That being said, there’s a good reason why most website owners think twice before migrating their websites to a new host.
Many nuances can occur due to or during the web migration process.
Here are some important website migration checklists you should consider before transferring your website:
- Downtime: Downtime is guaranteed during the website migration process, particularly when the DNS change propagates. So, you need to plan for a potential brief downtime and set up a maintenance mode during the transition.
- SEO Ranking: A site’s IP address, proximity to the user, and even the aforementioned downtime can affect your website’s SEO ranking. Not to mention, content errors, domain errors, or website errors (404) due to a website migration can also hurt your SERP ranking. So, take proper measures to prevent the deadly effects of migration to your website. Contact the SEO specialists or hire some SEO experts before attempting to migrate a website to new host.
- Current Hosting Issues: Identify what problems you are experiencing with your current host (performance, downtime, customer support). This will help you select a host that doesn’t have the same limitations.
- Loss of Important Files: Loss of critical website files, such as customer data or transaction history, can be a big deal breaker and hurt your website’s perception. So, backup your WordPress site before initiating the migration to ensure your data is safe, even if unforeseen issues occur.
- Database Size: The size of your website, including the database, will affect how quickly and easily the migration process goes. Large websites require more time and bandwidth. And if certain files go missing, you may even encounter Error 500.
Carefully consider this website migration checklist and plan out the migration process. Then begin the transfer!
How to Migrate a Website to New Host
Before jumping into the website migration steps, make sure you properly plan out the whole transfer process and manage the necessary tools beforehand.
After that, follow the below-listed website migration step-by-step guide accordingly:
1. Properly Choose a New Hosting Provider
The first thing you need to do is find a reliable hosting company. Usually, you’ll need to pick the one that serves all your needs. While you’re at it, it is also recommended that you choose a new hosting service that offers free migration and help migrate a website.
Furthermore, this new hosting platform will either make or break your entire hosting experience and website’s performance.
Hence, consider the following aspects before choosing the right hosting provider:
- Uptime Guarantee: Look for a provider with a strong uptime record (99.9% or higher).
- Server Performance: Ensure they offer robust server infrastructure (like using NVMe storage and LiteSpeed server software) that supports fast loading times.
- Customer Support: Choose a host with 24/7 customer support in case you encounter issues during the migration.
- Scalability: If you plan to grow your site, ensure the hosting provider can scale with your business needs. Also, make sure the new host supports numerous website creation platforms, like CMS or coding from scratch.
- Security Features: Make sure your new hosting company has proper cybersecurity measures in place. Look for features like SSL certificates, malware scanning, secure CDNS, and automatic backups.
- Budget: Not only do different hosting platforms require different types of fees, but they also have different tiers for the hosting features. Choose the platform and subsequent subscription service based on your budget.
The Holiday Season is underway, and most hosting companies are offering huge discounts on their plans. See our comprehensive list of the Best Black Friday Deals on Hosting to grab the best deal this year!
However, there are various hosting companies, each with its own migration options. As it’s hard to include all of them in a single write-up, I have chosen Hostinger as an example of the website migration process.
Note: This process to migrate a website can look different depending on your provider. Regardless, it’s always the same in practice.
2. Backup and Export Your Website’s Data
Now, let’s start the migration process by exporting your website, which is pretty much the same as backing up your website database.
There are two ways to do so — manually or via a plugin. Let’s discuss both ways:
Manually Export Website Data
Some web hosting platforms may not have a dedicated feature to back up your website. In that case, you’ll need to manually backup and download your website files. Here’s how:
Download a File Transfer Protocol(FTP) client, like FileZilla, and install it.

In the top bar, type your host’s name, username, and password of your existing hosting account.
Click on Quickconnect. This will connect Filezilla to your hosting account and all of its data. You can now easily interact with all of your website data from one place.

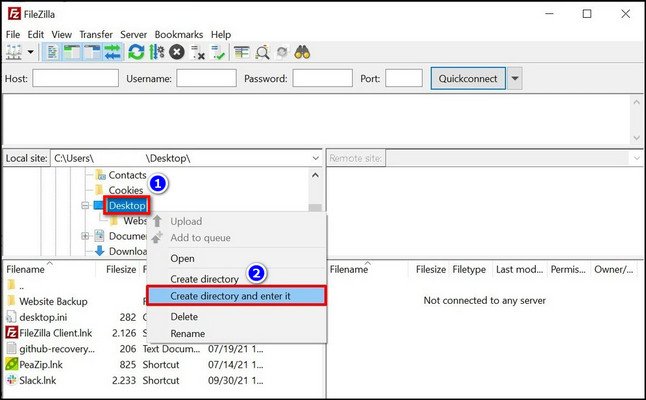
Now, you can see multiple sections, including Local Site and Remote Site. The Local Site is your computer’s local disk where you’ll save your backup.
So, from the Local Site section, right-click on Desktop, select Create directory, and enter it. Name it website backup. We’ll save our website backup here in this folder.
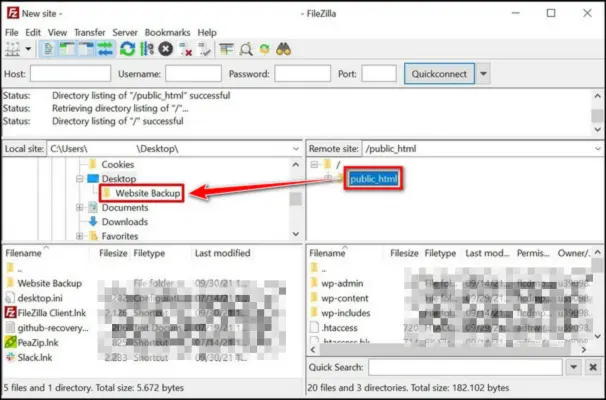
From the Remote Site section, find your website’s public_html folder. If you’re using WordPress, you’ll need to select the wp-content folder along with the wp-config PHP file.
Drag and drop the folder/items into the newly created website backup folder.
It’ll take a few seconds/minutes, depending on your site size, to download all the files on your website.
This is how you take backups using the 3rd party app Filezilla.
Later, while you are setting up your website again from the backup, find the folder “Website Backup” on your desktop and use the backup file to restore the website.
However, if you don’t want to install anything on your machine, then you need to install a web app called plugin on your WordPress dashboard!
Let’s see how to go on with that:
Export Your Website Data via Plugin
If you’re using WordPress, you can install a WordPress plugin to back up your website’s files. To do so:
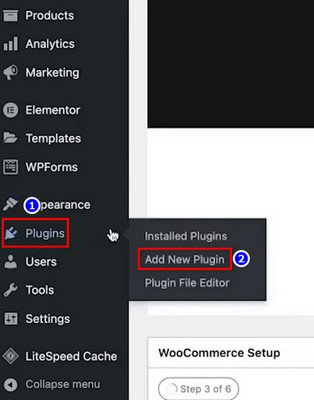
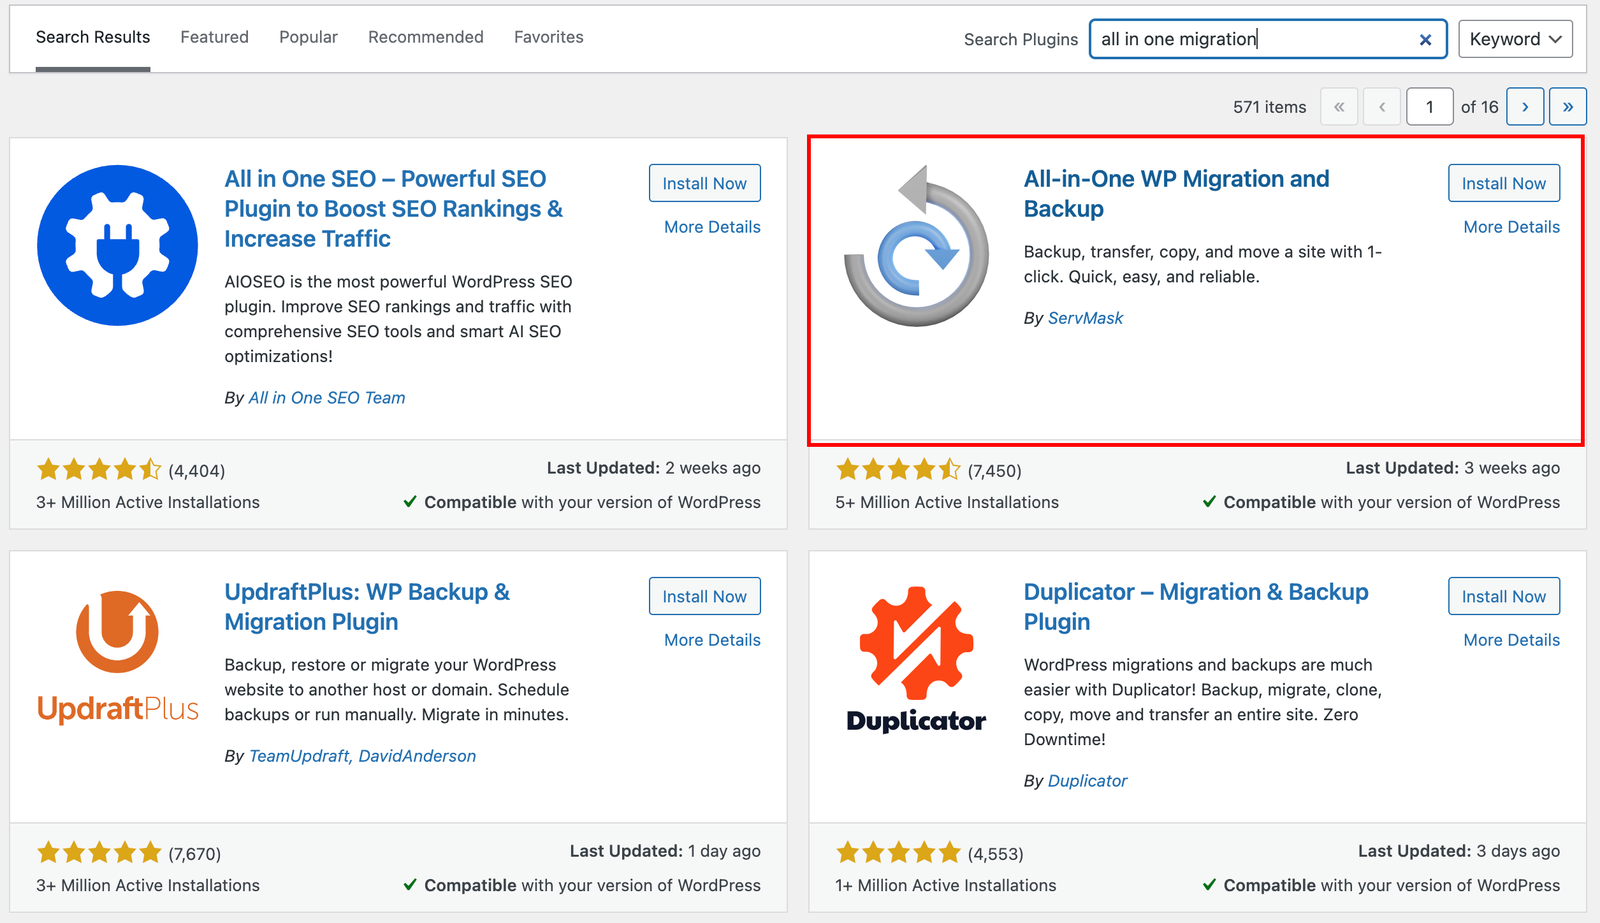
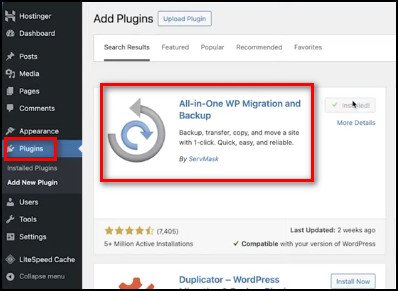
Login to your WordPress dashboard and go to the plugin menu. Click on Plugins > Add New Plugin.
Search for the All-in-One WP Migration and Backup plugin and install+activate it.
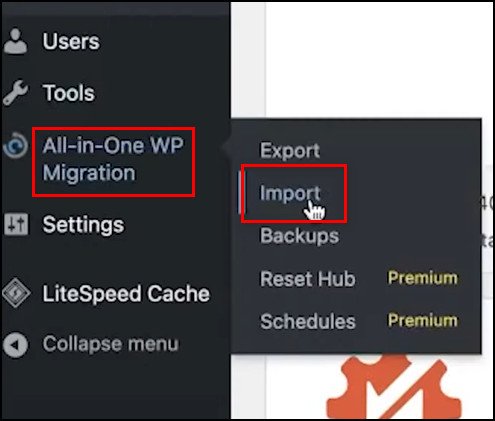
Hover your mouse over the All-in-One WP Migration section that will appear on your WordPress dashboard. If you don’t see such an option, refresh your browser tab. Now, select Export.
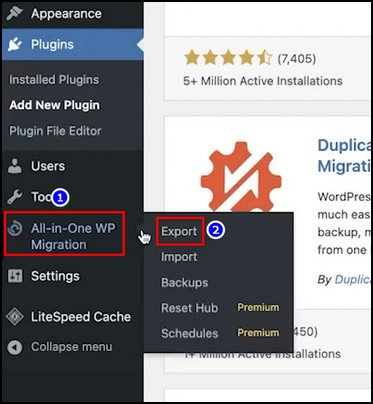
Click on Export To > File. Wait while the plugin prepares your website’s files. Then select Download and save the file to your local computer.
Now, you have a backup copy of your website that’s been downloaded onto your offline computer.
3. Download the SQL Database of Your Website
It is equally important to download your website’s database before changing the host. However, not all websites have a database. If that’s the case, skip this step.
If not, read on.
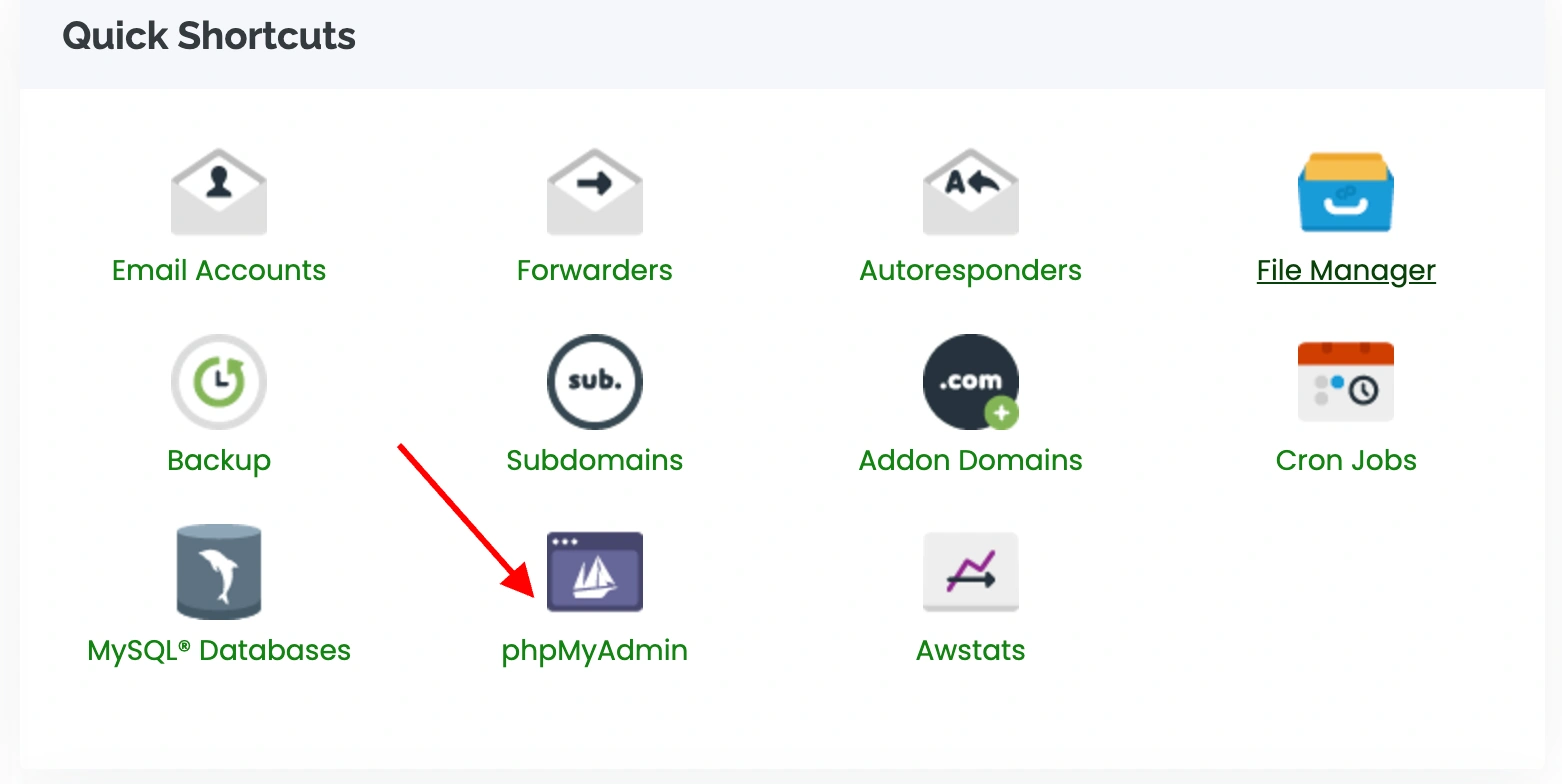
Since some hosting companies don’t offer a built-in option to download databases, let’s take a manual approach. To do this, you’ll need the phpMyAdmin app.
Here’s how to download your website’s database manually:
- Log into phpMyAdmin with your hosting info.
- Click on phpMyAdmin and find your site’s database name under the List of Current Databases section.
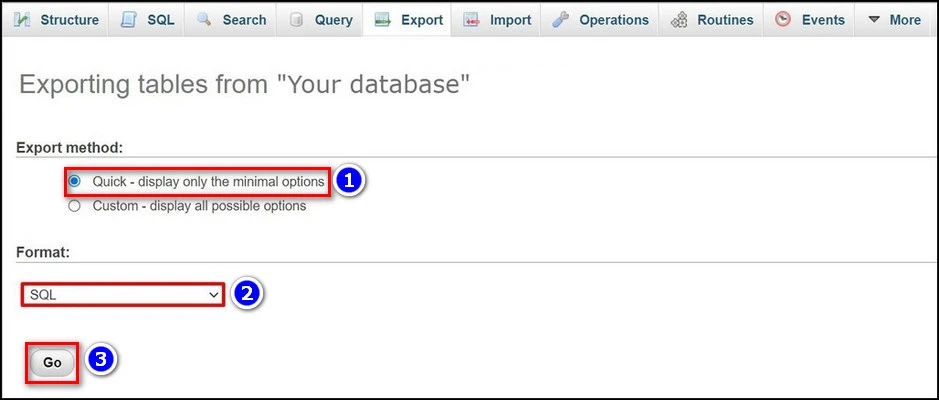
- Select all the files and click on Export from the top bar.
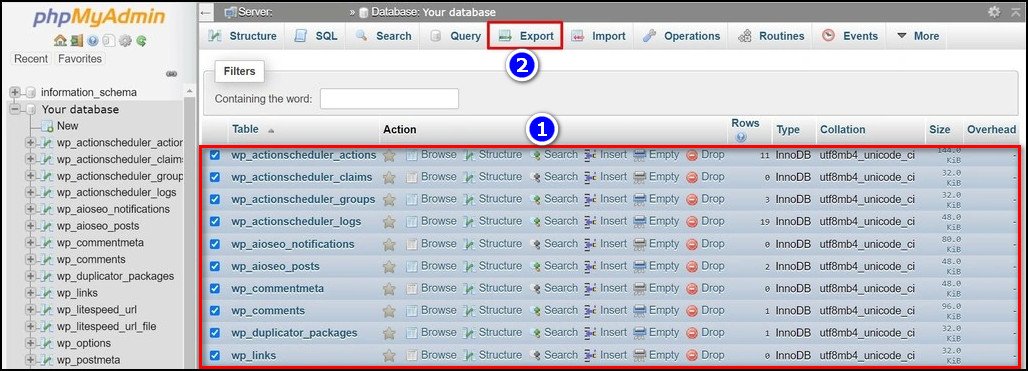
- Choose Quick from the Export Method section.
- Select SQL from the drop-down menu under Format.
- Hit Go and download your website’s database in ZIP format.
That’s it.
4. Unlock and Transfer Your Domain Name
Next up, you need to transfer your domain name to the new host. However, most hosting providers lock the domain name, so it can’t be changed without your permission.
First, we need to unlock the domain. To do so, go to the Domain tab inside your hosting account and select Settings for that domain. Then, scroll down to Transfer or Move Domain and disable the toggle for Domain Locked.
After that, you can transfer your domain name in two different ways — paid and free.
Since you’re reading this guide to learn how to migrate a website to a new host, you should do it yourself. Therefore, let’s see how you do it free of charge!
Transfer Your Domain Name for Free
- Go to the domain registrar where you bought the domain.
- Log into your account and find the settings to change the nameservers under Domain Overview or Domain Management.
- From the hpanel, click on Domains and select your domain.
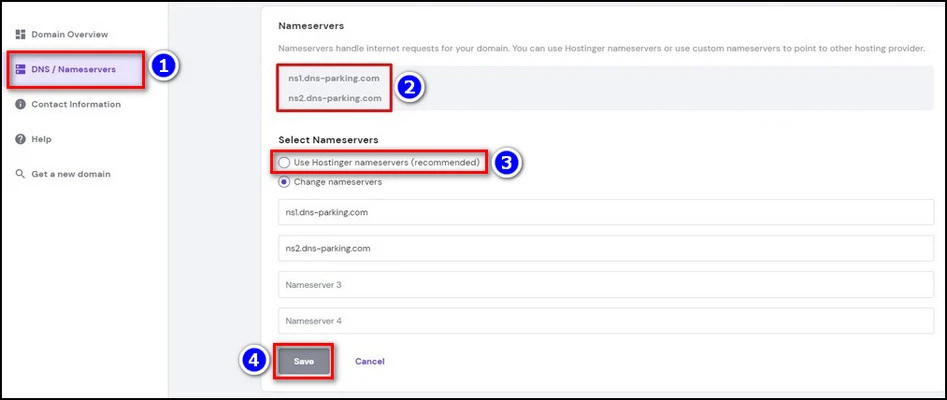
- Select DNS/Nameservers > Change Nameservers.
- Input the following in the first empty field:
ns1.dns-parking.com
ns2.dns-parking.com
- Select Use Hostinger nameservers and hit Save.
Now, the DNS propagation process will start to finish transferring the Domain to a new host.
FYI, DNS propagation can take up to 24 hours.
5. Import Backup and Database to the New Host
Now, you need to import the website back into your new domain. Here’s how:
Import/Restore Website from Backup file using a Plugin
After transferring the hosting to a new provider, it’s time to import the backup file we exported using the all-in-one WP Migration WordPress plugin. Let’s use the same plugin to import the website.
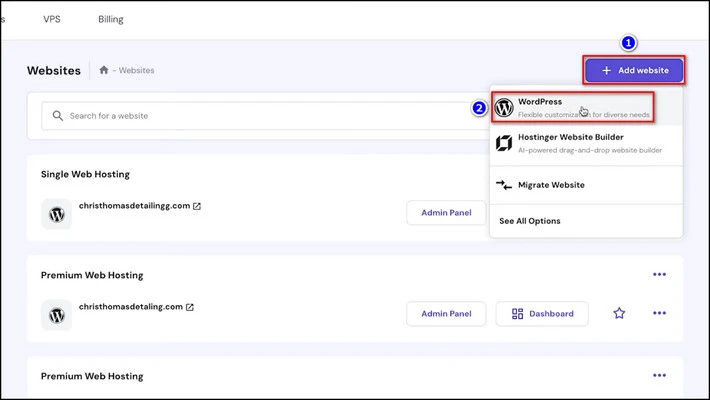
- Go to Hostinger’s dashboard and select Websites > Add Website > WordPress.
WordPress released a new update just a few days ago. Check out our content exploring the new features of the WordPress 6.7.1 Update.
- Go through the onboarding process to create a new website.
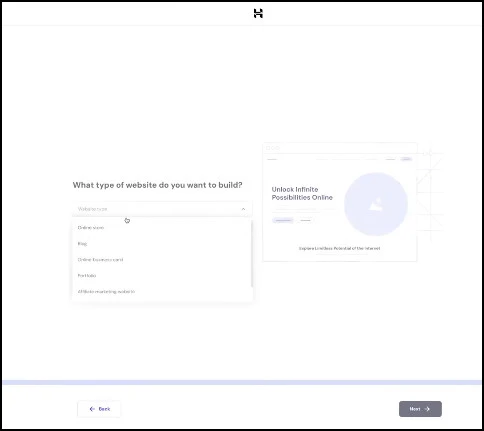
- After finishing the website creation formalities, type your domain name in the input box and hit Next.

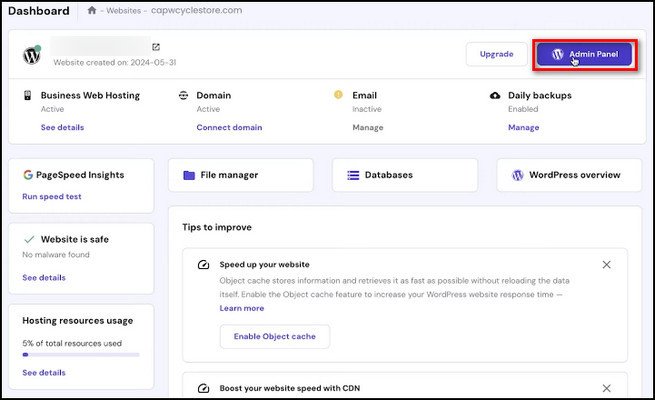
- Select the Admin Panel after installing WordPress into your new website.
- Go to the Plugin panel and install the All-in-One WP Migration and Backup plugin following the previously mentioned process.
- Select All-in-One WP Migration and Backup from the left side pane and click on Import.
- Click on Import From and select File from the drop-down menu.
- Go to the Website Backup folder on your computer and select the file(s).

Your website will be imported into the freshly installed WordPress core in your new host!
However, you can use other plugins, like WP All Import. We use the same plugin to maintain continuity.
Manually Import/Restore Website from Backup file
- Go to your desktop and unzip the website’s database.
- From the hPanel, go to Databases > MySQL Databases.
- Type the database name, username, and password to create a new database.
- Hit Create.
- Go back to hPanel and select Database > phpMyAdmin.
- Select the newly created database and hit Enter phpMyAdmin.
- Click on the Import tab.
- Hit Choose File and select the unzipped database files.
- Click on Go.
That’s it.
This is how to migrate WordPress website to new host easily! Now, there is only one thing left—testing your site before going live. Let’s do that, too.
6. Test Your Website
Before going live, it is important to check whether everything is running perfectly or not.
To do so, you should try testing domain functions. You can develop and test your website locally using software like XAMPP or WAMP or even create a staging server. Many CMS, like WordPress, offer options for that.
Also, run the website in a risk-free environment to see if both the front and back end of your site are working as intended.
If necessary, you can edit your website’s files and change DNS settings accordingly.
Bottom Line
As our business grows, so does our need for a better, more robust online presence. That’s one of the main reasons why most people transfer their website to a new hosting provider. However, many take a step back because of the perceived complications of the process.
As I have shown in this step-by-step migration process, it is quite easy.
Anyway, that’s it for today. I hope this write-up has provided all the necessary information you were looking for.
Have a nice day!