
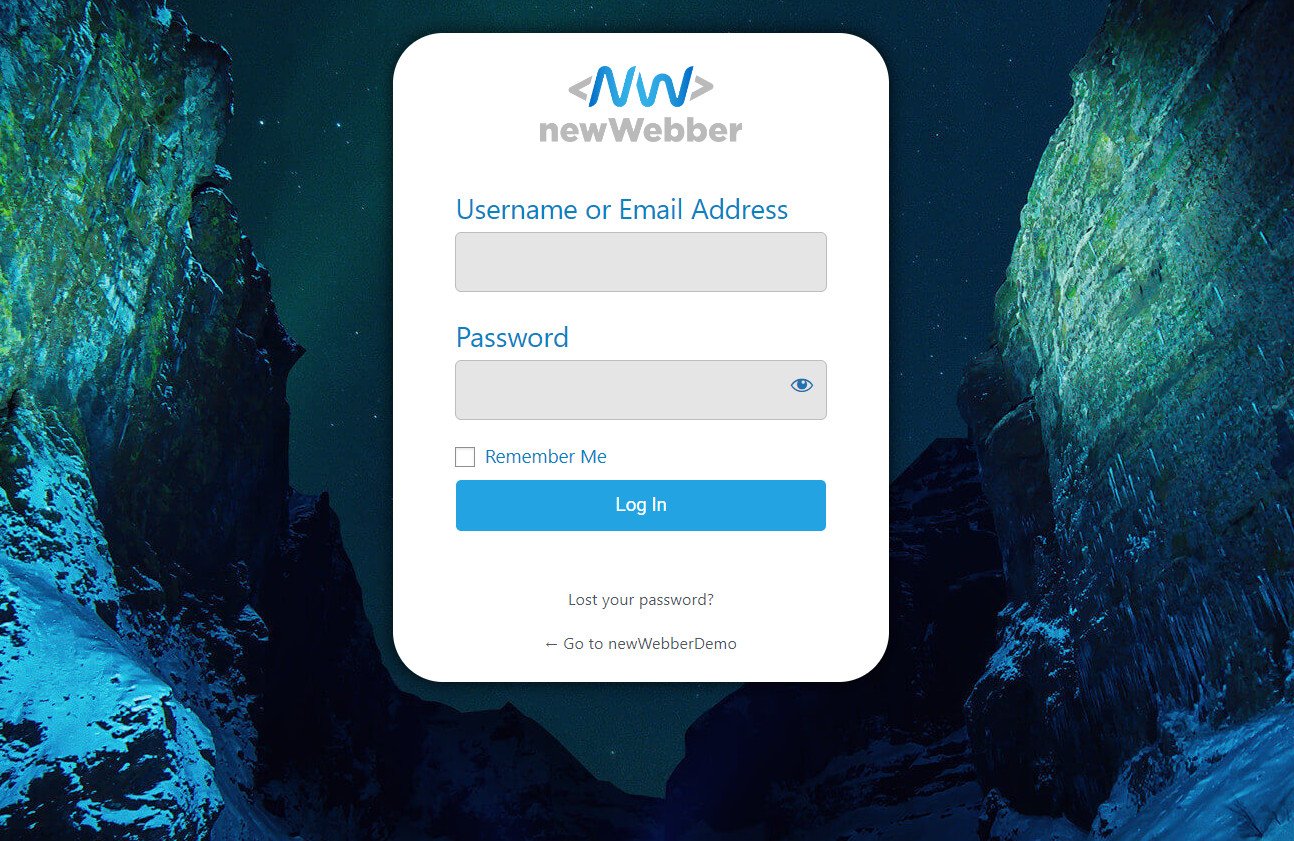
The default WordPress login page looks quite bland with its white and blue theme. I mean it works fine as you can log in and out successfully, but there is no visual flair to it. But there is no reason to keep it that way for your site.
You can easily create a custom login page for WordPress and make it your own. Add custom images, logo, and videos and infuse a touch of your brand. Your audience will connect more with your site when they see such a personal touch in the registration/login form.
In this article, we will look at different ways to create a custom WordPress login page. So, let’s jump right in!

Why Create a Custom WordPress Login Page
Most of us customize our WordPress sites according to our needs. Tweaking the themes, and adding images and videos create the perfect site for us. But when logging in to the WP dashboard, we kept the default one with the WordPress logo and white background.
For the admin or in-house employees it may win or lose nothing. But for your potential customers or members who frequently use your site, this breaks the user experience. While seeing your site with its themes and colors, it may disrupt the engagement as they suddenly see the white login page.
Some may even think the login page isn’t part of your site, get confused, and finally leave your site for another alternative!
What a horrible scenario for a webmaster…
That’s why you should create custom login page so that it looks and feels like your site and doesn’t bore your visitors. It must contain your logo and the same font. Then, the visitors will feel right at home!
Wondering how you can do this? The next section shows three different ways to customize your WordPress Login Page. So, let’s dive deep!
How to Create Custom Login Page for WordPress
There are three ways of making a custom WordPress Login Page.
#1 Use a custom login page building plugin and customize the default Login page that comes with WordPress.
#2 Create login form using WPForms plugin and add a custom page using WordPress’s simple block editor
#3 Create a new page and put a login form there. Then customize it by your choice. A page builder plugin such as SeedProd or Elementor has all the tools to do this.
Nevertheless, all methods will produce the same result. Though customizing an existing login page takes less time than creating a new one from scratch. However, we’ll show all of them so that you can do it with ease.
Method 1: Creating Custom Login Page Using LoginPress
LoginPress is a WordPress login page customizer plugin. It has all the tools to edit and customize the default design of the WordPress login page. You can change the logo, fonts, background image and make it look like your own site.
To make a custom login page using this method, install LoginPress from the WordPress plugin directory.
Learn how to install and use a plugin in WordPress if you don’t have any idea about using plugins.
Log in to the WordPress Dashboard and navigate to Plugins > Add New. Here, search for loginpress and press the Install button. Activate the plugin and it’ll take you to the plugin welcome page.

Here, click on Allow and Continue to grant permission to send you their updates and such. Skip this step if you don’t want to get involved any further with LoginPress promotional campaign.
Next, click on Customizer under the LoginPress menu. This will open an editor similar to the WordPress theme customization.

Find a bunch of different tools to customize the login page here. So, let’s do that now.
Go to the Logo menu and add your logo by clicking Select Image and choosing the logo file. Adjust the logo dimensions by pulling the sliders if needed. Change the Background to something of your style or your site’s vibe. Select any image or any solid color to appear on the back of the login form.
Use the same colors from your WordPress theme to give the login page a consistent look.

After personalizing the logo and background of the login page, customize the login form. For that, click on the Customize Login Form. Change the form field length, radius, background, and text size, and color from there. Change these to match your site’s logo and text colors.
Now it’s time to beautify the login button!
Click on the Button Beauty and choose the button’s color, background, border, shadow, padding, text size, and so on. Try to make the login button blend with your site’s design. As you see here, we changed its color to match our site’s logo.

There is another section where you can place custom Error Messages for your custom login form. For example, when someone enters a wrong password, you could show a witty message such as Jurassic Park’s famous line Aha, You didn’t say the magic word!

Finally, click on the Publish button to finish customizing everything. Now check out the login page to see how you’re done with the customization.
This is how my custom WordPress login page looks now. Share yours in the comment box!
Method 2: Create a Custom Login Page Using WP Forms
If you do not want to use WordPress’s default login page and create your own custom login page, the next two methods will focus on that. This is more suitable for creating a separate login page for membership registration, user login and such.
It’s a two-step process. First, we use WP Forms to create our login form, then add that form to a new page, which becomes part of our site. However, you don’t need to purchase the Pro version of WP Forms to make a basic form. But if you manage multiple sites, then getting it is highly recommended.
So, first, download and install WP Forms from the WordPress plugin directory.
Here, we will not delve into showing you how to activate its premium license. Once installed, hover over WP Forms that appear in the left tab of your WordPress Dashboard and click on Add New.

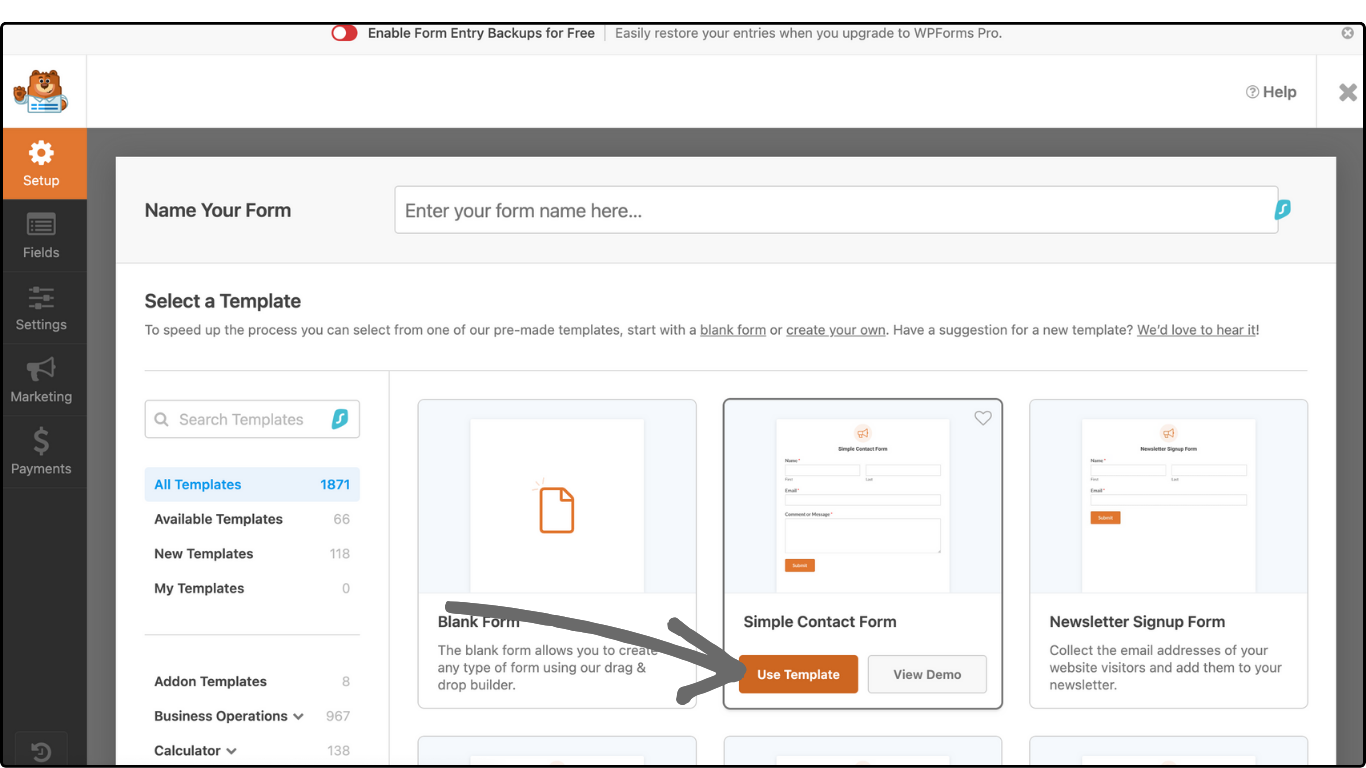
WP Form’s designers prepared some stunning form templates on their dashboard. Check them out and find a suitable form for your use. Click on Use Template and start customizing the form as per your need.
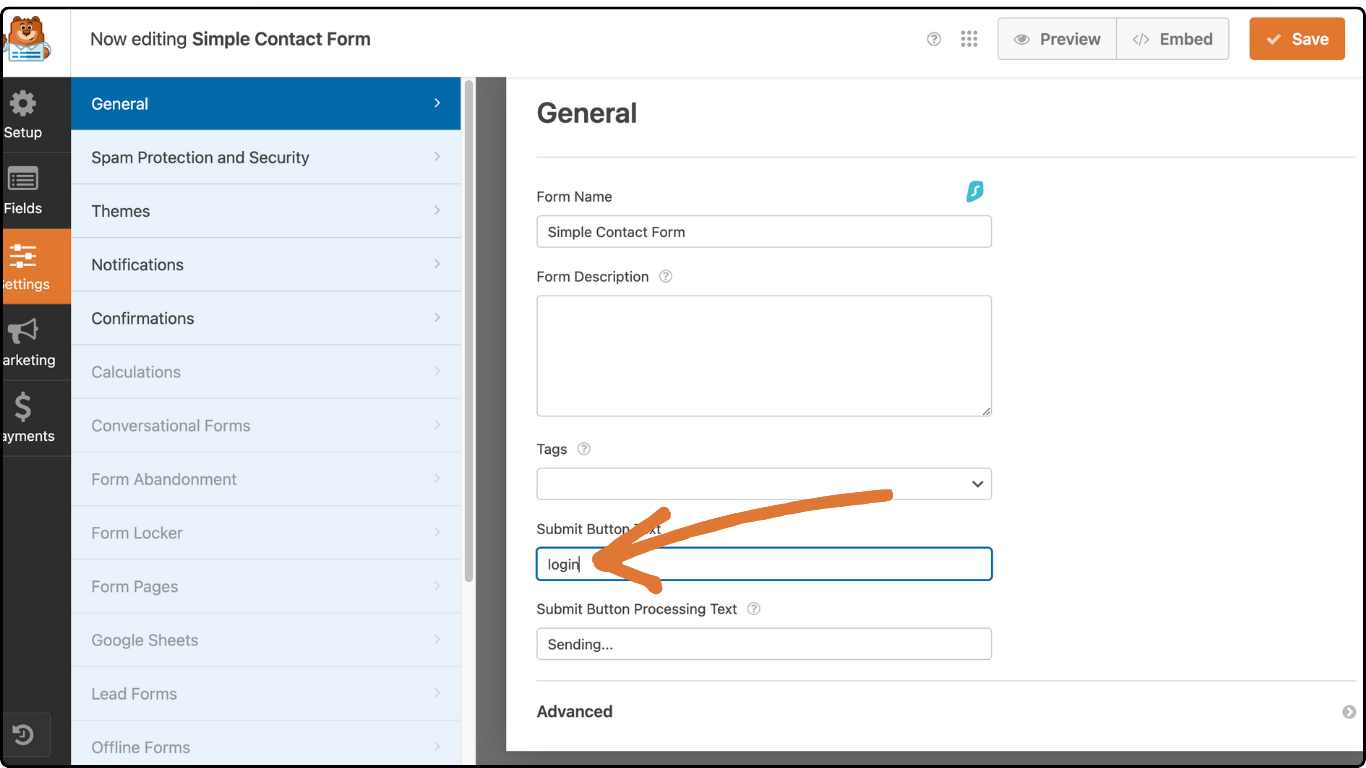
Now roam around the WPForms dashboard and make changes if you want. Customize text style, size, color, field, and so on. Change the text on the login button as it is set as Submit by default. Clicking the button gives you the option to enter a custom text.
You may want the form to redirect the user to a different page or show a welcome or successfully logged-in message. This is present in the Confirmations tab. Click on it and choose your desired action. Then, enter the URL or the desired message.
Our form is ready now. Click on the Save button at the top.
Now, one last thing to do for making a custom login page. You need to create a new page and place this login form in it to make the custom login page alive.
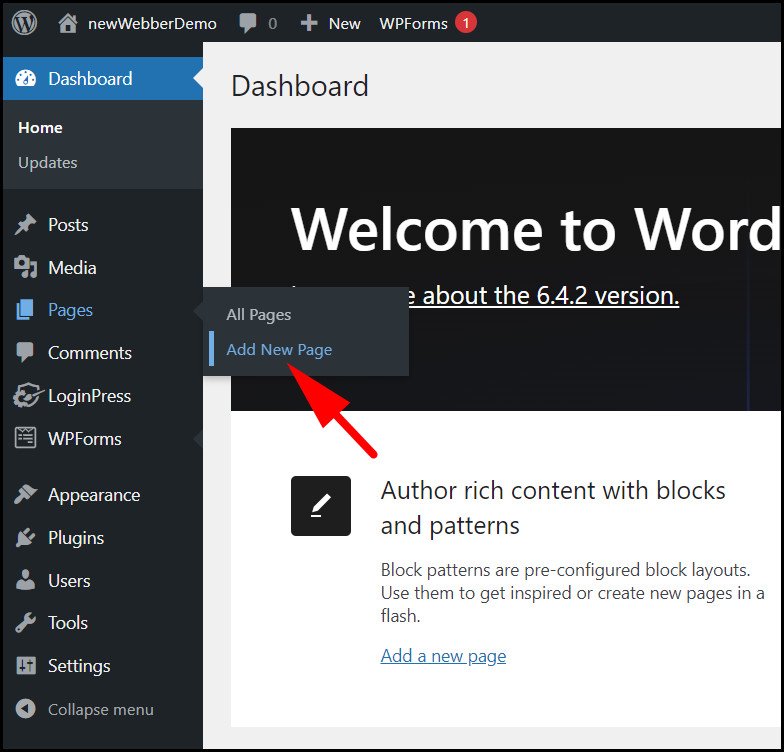
So, close the WP Forms window and go back to the WordPress Dashboard. Hover over Pages and click on Add New Page.
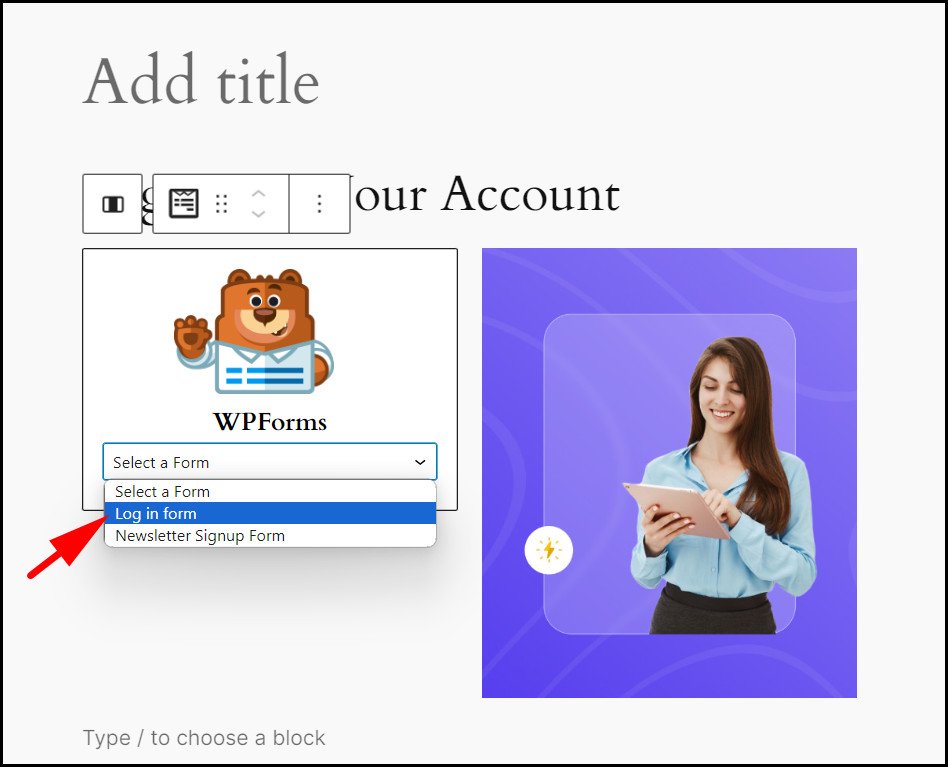
Enter the relevant texts for the page headings. We’ve added an image to complement the form. Then click on the plus icon and search for WP forms. Click on the addon when you see it.

Select the form that we made earlier. It will appear on this page instantly.
You can add additional texts or images to this page if you want. Then click on the Preview button and see if it looks perfect. Finally, click the Publish button at the top.
Your login page is now live!
However, we need to add this custom login page to the navigation bar. Or you can just link this page to a call to action button anywhere you want. For now, we’re gonna add this to the menu on the homepage. So let’s see how to do that:
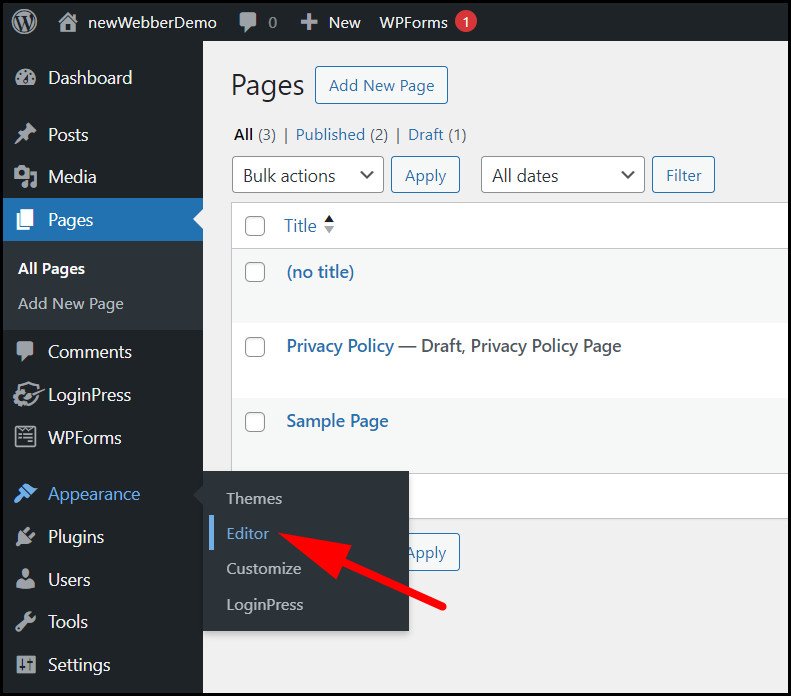
To do this, go back to the WordPress Dashboard and navigate to Appearance > Editor. Then click on Navigation.
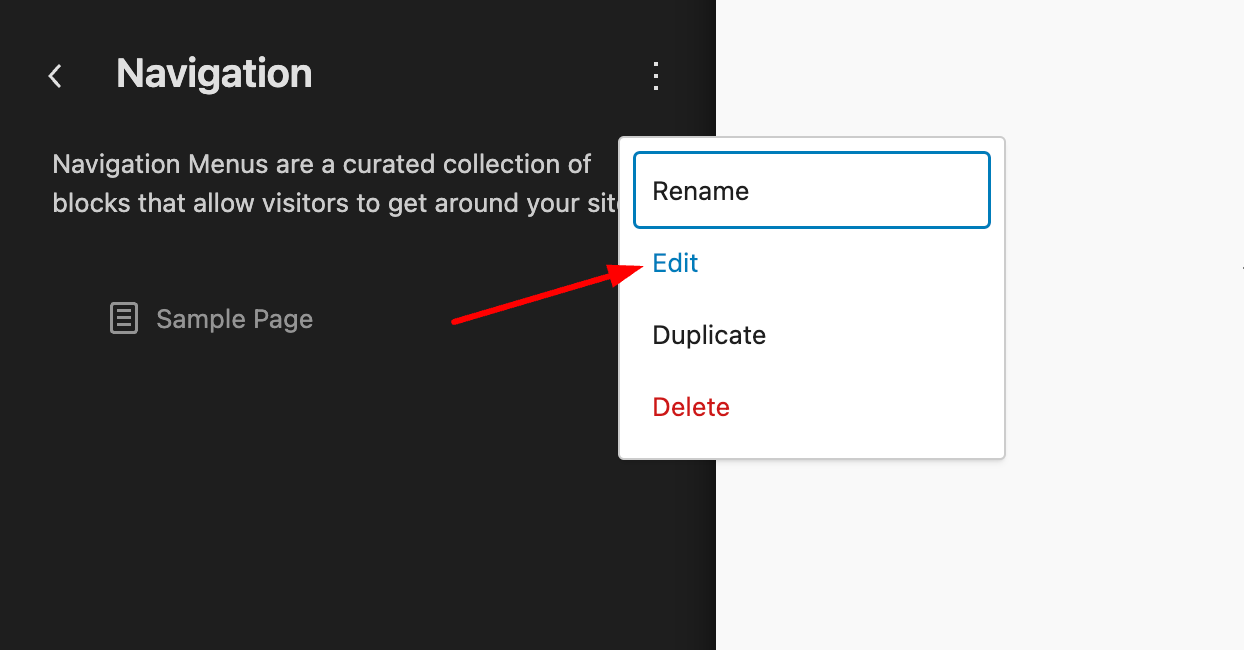
Click on the three dots you can see on the right side of the navigation tab. Now, press the Edit button.
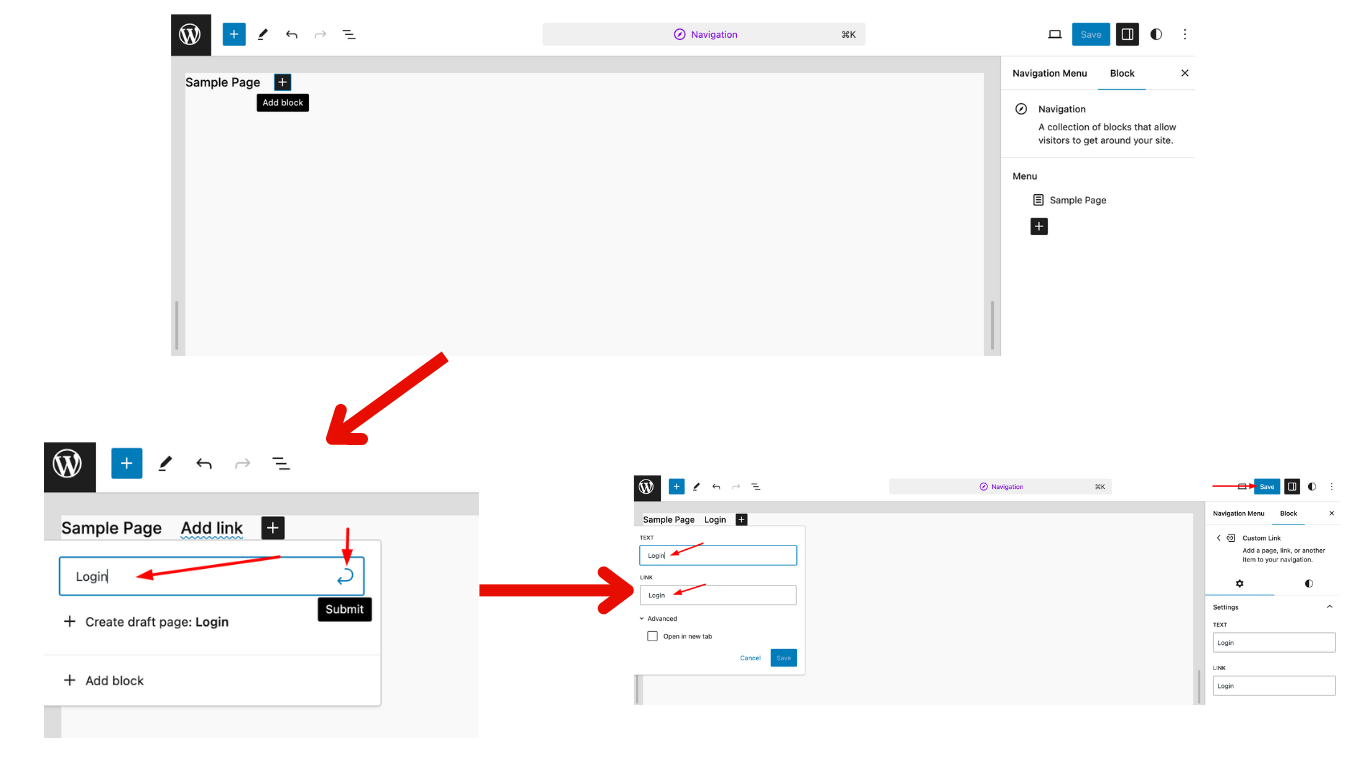
Here, you can add a new block containing the link to the login page. Select the login page from the list. Then, add the text for the login page link. Press the Save button at the top to confirm the changes.
Now, when we go back to your site, there is a log-in section added to the navigation bar. Clicking on it will take us to the login page we just published.
Method 3: Create a Custom Login Page Using Elementor
A page builder plugin can also help you create a custom login page for your WordPress site. There are many popular options to choose from, such as Divi, Elementor, Seedprod, etc. The paid versions of these plugins have widgets that can add some stunning forms to your site as well.
However, for this part, we need to use the Pro version of the Elementor plugin. Skip the section if you’re not ready to use anything that’s paid. And if you’re willing to spend some from your pocket then go ahead.
Trust me, it’ll be worth the cost. Elementor has it all that you need to build an amazing website without touching anything complex. They don’t call the number 1 drag & drop page builder for nothing!
For now, install Elementor from Plugins > Add New in the WordPress Dashboard. You’ve already become a pro installing a plugin, right? So let’s just move further and use the Elementor already!
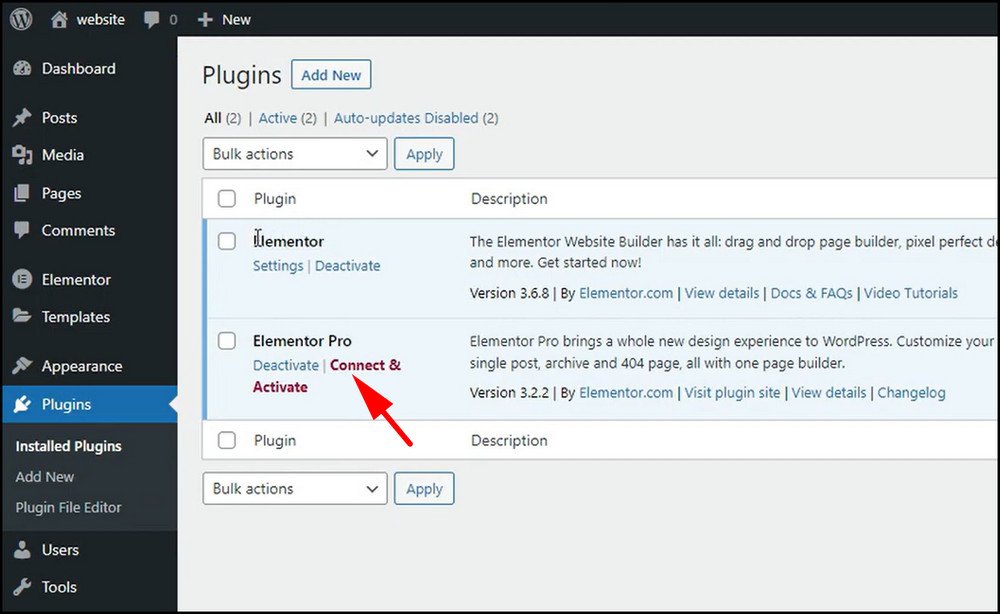
After installing the plugin, Activate its license if you haven’t done so already. Navigate to Plugins > Installed Plugins and click on Connect & Activate under Elementor.
Then log in using your username and password. On the next screen, it will ask you to connect and activate Elementor. Click Activate and your Elementor license will be linked to your WordPress site.
See the full video tutorial from Elementor to learn how to Install and Activate Elementor Pro!
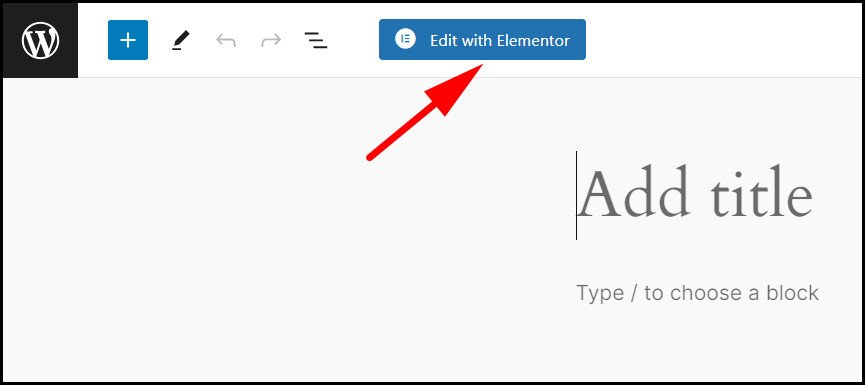
So, now once you’ve successfully activated Elementor Pro, it’s time to get it to work. Go to Pages > Add New from the WordPress Dashboard. Then a new page will be created. Now, click on the Edit with Elementor button at the top. This opens up the Elementor editor.
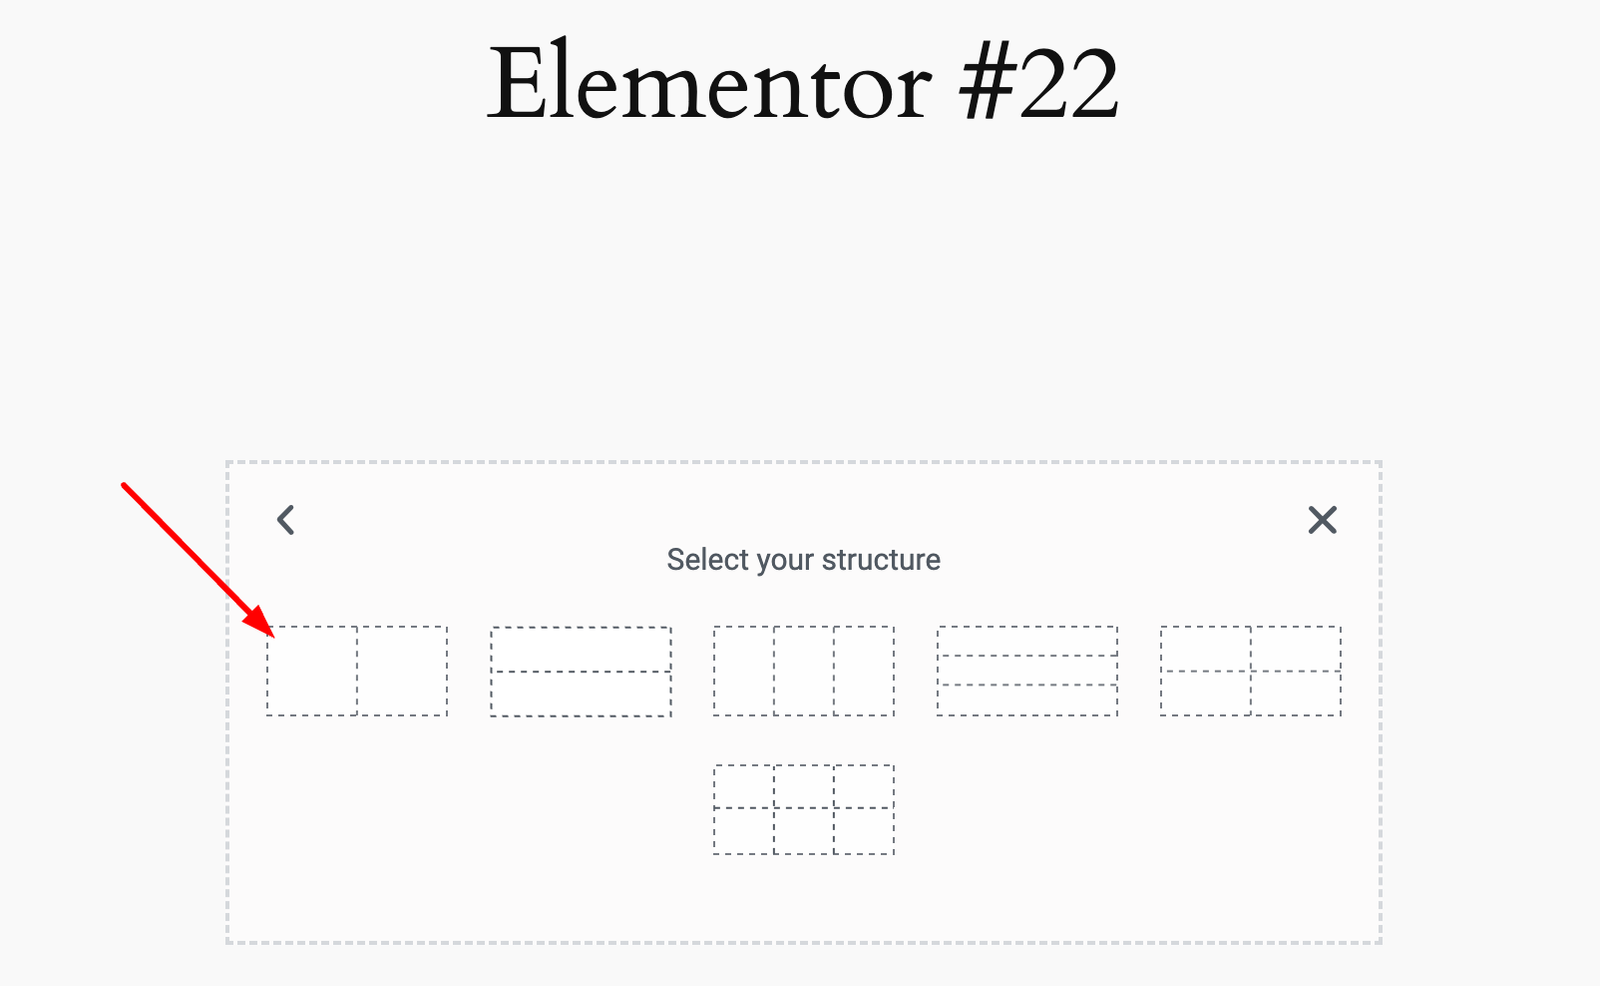
Press the plus icon and select the type of block you want. We went with a two-section block.
Click the left section and search for the login form widget in Elementor’s elements section. Drag it to the left section that we just created. This will place a pre-built login form. To customize it, click the Edit icon on the top right. Here, you can change the form and its field texts, size, border, background, color, and so on.
Also, set what page the user will land after successfully logging in. You can add a captcha to strengthen security and place a Remember Me button to allow the user to save their passwords in the browser.
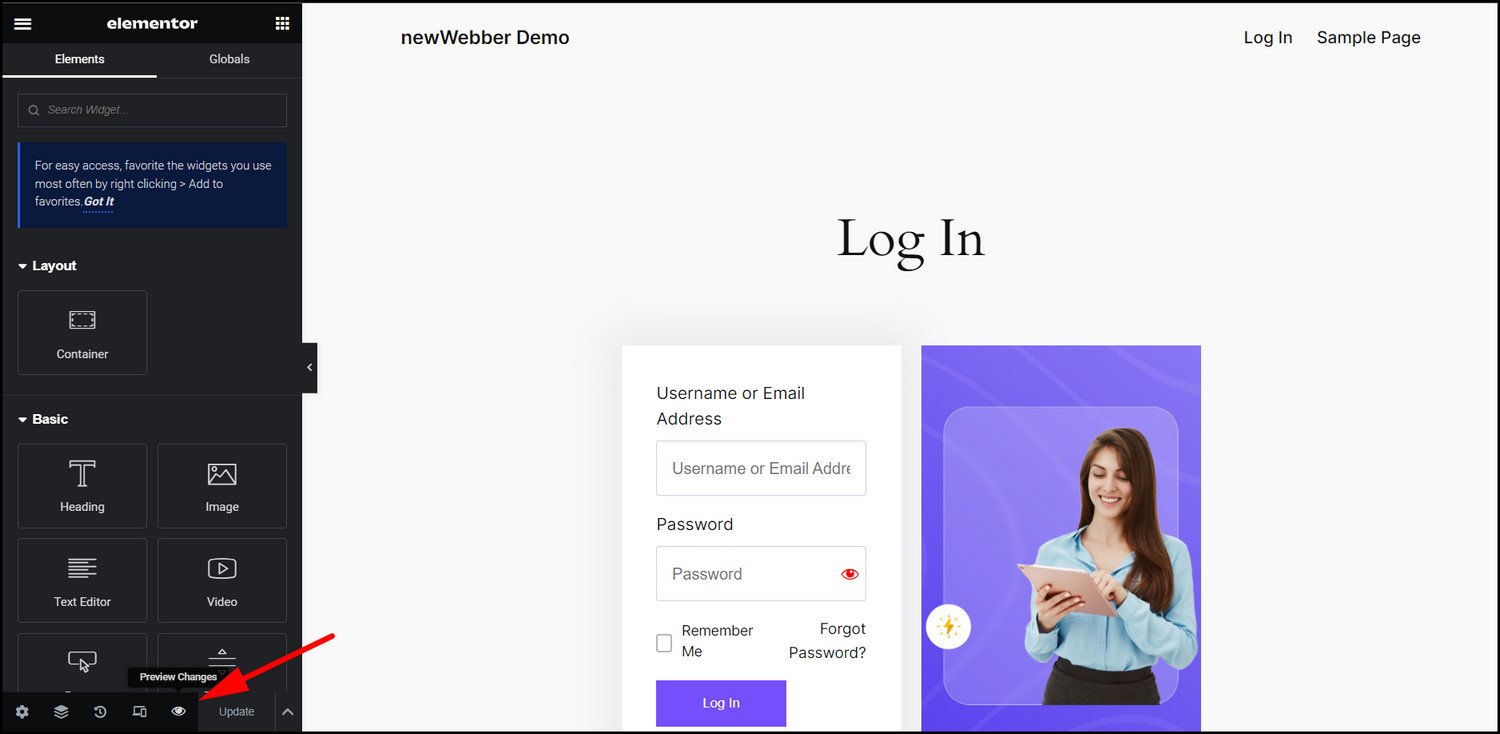
Add an image next to the form. Click on Elements and drag the Image widget into the right section of the form that we created earlier. From here, click on Choose Image and select the image from your computer. Adjust the image fill, height, and borders to make it look good.
When everything looks okay, click the Preview button and check the design one final time. Finally, click on Update, and the login page will be published. Reload your site in a separate tab, and it will have a login page now.
How to Secure WordPress Login Page
So, you finally created a login page for your users. But what if unwanted visitors log in to your site and steal the precious data of the existing users? That will be devastating for both you and the users.
Hackers use a DDoS attack to gain entry to any website. They use bots to try logging in repeatedly until they get access. If some user has set a weak password for their account, it becomes easier for them to log in. Then, they can do all sorts of damage by stealing data, changing existing passwords, and so on.
To prevent this from happening, put the following security measures in place:
Set up a 2FA System
A Two-Factor Authentication system means a user needs a correct username, password, and a 2FA code to successfully log in. The code usually arrives at a user’s mobile phone. This safeguards a user account, as the intruder needs to enter the 2FA code to access the account. Otherwise, they will be unable to pass through the login screen.
2FA is used everywhere to secure user accounts. So, you must implement it on your site. For that, check our detailed guide to setting up a 2FA system on a WordPress site.
Use Google Captcha
A captcha is very adept at preventing bots from attacking your login page. Hackers will usually use bots to guess the passwords continuously. A captcha prevents this by making the bots guess the correct words or images from a list of similar-looking options.
An advanced version of the captcha, called reCAPTCHA, uses AI to make this task much more difficult. The tasks involve anything from identifying a correct pattern to correcting jumbled letters. Bots cannot access the login form unless they correctly answer these.
Most security plugins come with the captcha feature. Setting these up is really a breeze, even for first-time WordPress users.
Limit Login Attempts
Since the whole idea of brute force attacks is based on guessing passwords, that means hackers will attempt to log in continuously. You can thwart their attempts by limiting their ability to log in after a fixed number of times.
By default, WordPress allows for an unlimited number of login attempts. But, using a plugin, you can set a limit, say five times, before they cannot log in anymore. They have to wait for minutes or hours before they can attempt this again. As the intruders do not have the correct password anyway, they will be blocked from entering the passwords again, preventing hackers from running any brute-force attacks.
We have a dedicated article on limiting login attempts on a WordPress site. This is a must-read for those who want to secure their WordPress site.
Conclusion
A custom login page provides a consistent user experience to the users who will access it. Your site will not only look professional but also give off familiar vibes.
As we demonstrated here, there are multiple ways of creating a custom login page for WordPress. Even if you do not want to create one from scratch, at least customize it to look similar to your brand. Just follow our guide, and the login page will get a makeover in no time.
Hope you liked reading this piece. Stay with us for more cool WordPress guides in the future.